Remember that time we said we were going to close for vacation, but our website and phones would stay on duty to take your messages? Well, it looks like the phones are revolting, and demanding time off immediately. Right now we're having issues with our office system, and we're unable to take calls. Please shoot […]
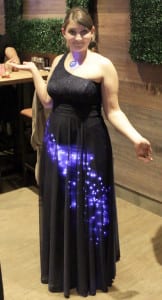
Technology Grad Dresses
I have a daughter. A daughter who likes pretty things, and like most daughters, likes to stand out once in a while. As the President of a local technology-hacking company, and having been involved with more than a handful of technology dresses & costumes in the Calgary area, she thought it would be a good idea if we worked together building a High-School graduation dress, with some techno-bling.
This isn't the first time we've worked on something together like this. It's our 3rd time around, learning more each time. In short, the dresses have been:
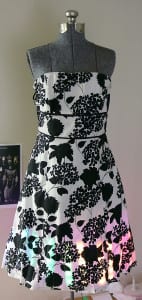
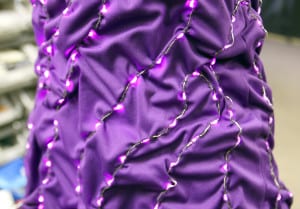
1) Dress 1 - Purple Prototype
This project is a Salvation-Army purple rescue dress for a MakeFashion mixer event, where we sewed in a prewired LED string with battery pack to the dress lining. Simple, quick, and effective.
Materials used:
- 1 x String LED strand with Battery pack, with additional...
- ...raw LED strings added to fill out the effect
Dress 1 Lessons Learned:
- Solid-core wire LED strands cannot be trusted to last more than a single evening
- Permanently mounting electronics to a dress is a bad idea for cleaning purposes.
2) Dress 2 - Addressable RGB LED Awards Dress
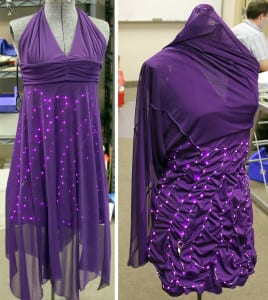
Another Salvation-Army rescue dress, this time being a strapless number for an awards banquet.
Materials used in this bundle:
- 3 meters of 30-LED/Meter Addressable LEDs
- 1 x Arduino Pro Mini - 5V
- 2 x 2 position, 0.1" Terminal blocks (we used more, but only 2 are necessary)
- 1 x 3AA battery holder
- 1 x JST RCY battery connector set.
- Although not used in this dress, we recommend 1 bobbin of Superflex Wire for longevity. We used PVC-coated ribbon wire which worked, but failed occasionally due to its stiffness.
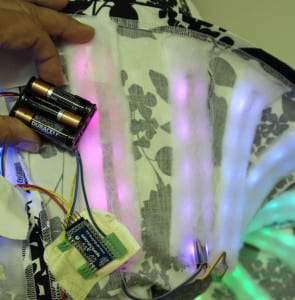
We sewed sleeves made from quilt batting to the backside of the fabric, in front of the crinoline lining. We also upped our game by using 30-LED/meter addressable RGB LEDs, with an Arduino Pro Mini for some skirt-color changing. Construction was easy:
- Wire battery "+" (red) to the LED strings "+" and the Pro Mini's "RAW" terminal block.
- Wire battery "-" (black" to LED strings "-" and the Pro Mini's "GND" terminal block.
- Wire the LED strips DATA line to the Pro Mini's D4 pin (easily movable in code)
- Use the FASTLED.IO sample code to run nifty colors!
Dress 2 Lessons learned:
- Even removable electronics are a pain to deal with.
- Quilt batting does a fabulous job of LED color diffusion.
- Gaffer tape is a good short-term solution for attaching battery packs to dress linings.
3) Dress 3 - the Starry Night
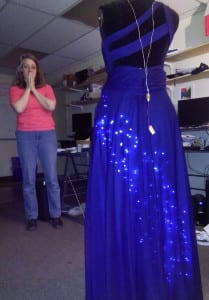
The latest and greatest, a proper store-bought and fitted blue 1-shoulder gown, with accenting laser-cut pendant with addressable twinkle effects.
The "Starry Night" dress parts in this bundle:
- 1 x Arduino Pro Mini - 5V
- 2 x 2 position, 0.1" Terminal blocks
- 1 x 6 position, 0.1" Terminal block
- 2 x BattR15 LiPoly cells
- 2 x HVJST2 LiPoly cell connectors
- 2 bobbins of Superflex Wire
- 10 x WS2812B LEDs on white PCB (individuals)
- 1 x Superflex LED Strand - Warm white
- 1 x SWT16 power switch
As this dress was a more serious investment than the other two, we planned out our electronics a bit more seriously. Our best decision was to invest in a "technology undergarment", otherwise known as a "slip". Apparently, they're a common accessory in women's fashions, but they also make a great technology layer.
This technology layer is something that Angela Dale has been harping to me about for ages, as she's worked on some pretty serious wearable technology costumes and dresses. She came into our offices a few years ago when she was needing to add lighting to stage costumes for the Calgary Stampede "Young Canadians" Stage production, and we've since collaborated on several projects. We've learned lots from each other. The point is, build your technology so it can be isolated from the fashion aspect as much as possible. It makes building and maintenance of both the fashion and technology aspects much simpler.
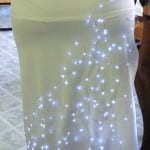
We picked up a reasonably good quality slip here in town, and fit it to my daughter's size, adding pouches for batteries and controller technology. Our plan was to create a "star field" effect on the whole slip with our new Superflex string LEDs, then intersperse "twinkle" stars using individual WS2812B addressable LEDs. The slip features a slit on one side, which worked well with our diagonal starfield orientation. Anchoring buttons were added to lock the technology layer to the dress.
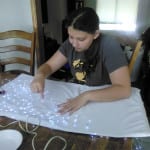
We laid a set of warm-white Superflex LEDs down on one face of the slip, and tacked it into place with hot glue. Testing the visuals under the dress gave us the idea to echo the off-the-shoulder flow with a flowing "milky way" starfield. The 3.7V LiPoly cells generated enough light that we didn't need to power the strings up to a full 5V. Subtlety was more important that bling in this design. Sitting tests on the LEDs strings showed they were quite robust, and they've easily handled two events without any wiring failures.
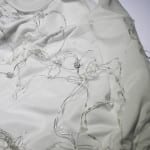
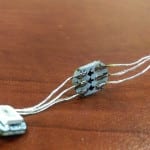
After mirroring the starfield on both sides of the slip, we glued the 12 addressable LEDs into place and cut strands of raw Superflex wire to link them into two 6-element chains. Two chains just in case if there was a failure in one of them, the total effect wouldn't be lost. This Superflex wire is something fabulous - 8 strands of enameled wire wrapped around a nylon core to form the equivalent of 26AWG wire, capable of carrying ~2A without the fatigue failure like it's solid-core cousin. We would triple up the distance between LEDs, use a soldering iron to melt through the nylon and enamel, and presolder the wire at the fold point, then snip it apart (leaving 2 pretinned wire tips). After a little practice, it was trivial to wire up the Pwr/Gnd/Signal lines between all the addressable LEDs.
We did run into some issues with burning out the initial WS2812B on each string. Input-impedance matching on the first LED from the microcontroller is proving to be quite necessary, as we were overdriving the signal to this first LED and making it go *poof*. We finally found a 560 ohm resistor from the Pro Mini to the first LED element stopped the killing issue. We had to replace six addressable LEDs.
The power draw on the system measured to be 460mA @ 4.1VDC (Lipoly full charge). The pair of 2000mAh BattR15 are wired in parallel to give us a solid 6 hours of action from the dress.
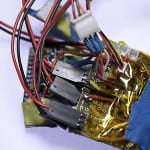
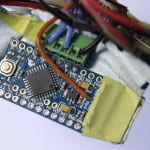
Electronics were split between the microcontroller and a wiring breakout board. The Arduino Pro Mini was outfit with our 0.1" spaced terminal strip connectors for easy debugging and possible future upgrading (accelerometers!). Unique connectors were used for addressable LEDs, power, and Superflex LED strings.
Dress #3 lessons learned:
- A technology layer is a must for a more-than-one-time use dress
- Hot glue is a viable construction method for attaching wearables
- Superflex wire is fabulous for flexing wearables (bobbin quantities available)
- A 560 ohm resistor on the 1st WS2812B LED in the chain saves lots of grief
- FastLED.io is a wonderful Arduino library to work with. It has a built-in animation that made creating the twinkle effect trivial.
- Use unique connectors for each subsystem. Batteries, addressable LEDs and Superflex LEDs all had their own family of connector. Simplifies on-the-body wiring up hugely.
The "Starry Night" Pendant
To accent the off-the-shoulder design, we decided a suitable pendant was necessary, which was fabricated by Solarbotics tech Dan Damron. Modeled around a 16-element Adafruit NeoPixel ring, we added accenting acrylic backing, a SeeedStudios Xadow controller and 400mAh LiPoly battery.
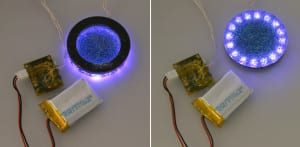 To offer maximum flexibility, we assembled the battery and microcontroller as a tidy rear-hanging pendant, with doubled-up Superflex wire forming the necklace chain. This allowed the wearer to flip the pendant so it either was dazzling (LEDs facing forward), or subtle (reflecting off the skin). The code used the same "snow-sparkle" code as the dress, continuing the effect.
We ran power, signal, and two ground lines out from the technology package that hangs down the inside of the back of the dress. We considered channeling the wire down the back straps, but it was really not intrusive being tucked under the strap into the small of the back.
We were drawing a minuscule 40mA, so we figured we had a very safe 6 hour battery life out of the battery.
"Starry Night" Pendant Materials used:
- Adafruit 16-element Neopixel ring
- Xadow Arduino controller (no longer available - substituting Pro Mini 3.3v)
- 50871 400mA LiPoly battery
- Superflex wire necklace
- Some very cool sparkly laser-cut acrylic (find your own; we scavenged!)
Conclusion
It is becoming easier to add technology to fashion, and these 3 dresses show that a simple lighting effect isn't difficult. Future iterations will feature motion and proximity responses.
Find a garment with a translucent quality, and start planning out your own technofashion. You'll find your soldering iron and sewing machine can belong on the same tool bench.
MORE POSTS
One of the most popular BEAM Walkers ever built was Mark Tilden's VBug 1.1 - Spyder. We've recently had the opportunity to shoot a series of high-resolution detail pictures of this robot, which we're now making available to you!
Happy First Week of September everyone! The kids are all back in school and there's that certain holiday right around the corner. Apparently Labour Day celebrates "the economic and social achievements of workers." And what a better way to celebrate than to not work! That's right - on Monday, September the 7th Solarbotics and HVW […]
Solarbotics, Ltd. is not responsible for misprints or errors on product prices or information. For more information, please see our Terms and Conditions.
Warning: This product contains chemicals known to the State of California to cause cancer and birth defects or other reproductive harm.
Please visit www.P65Warnings.ca.gov for more information. This item was manufactured prior to August 31, 2018.

