Yikes. It seems like we've been sorely neglecting our Wednesday Cool Link duties over the past month. Let's fix that, shall we? Here's our latest selection of neat-o internet thingers. Tom Sachs' Firearm... Things Yana pointed out this interesting mixed media artwork gunwork firearmwork thingwork. It's not actually functional, but it's a neat example of […]

Robot Costume Hack

Since Halloween is just around the corner we've built and published a few projects in order to give some ideas to the DIY costume-inclined folks. One is DIY Halloween RGB LED Kitty Ears and two is Halloween LED Witch Hat.
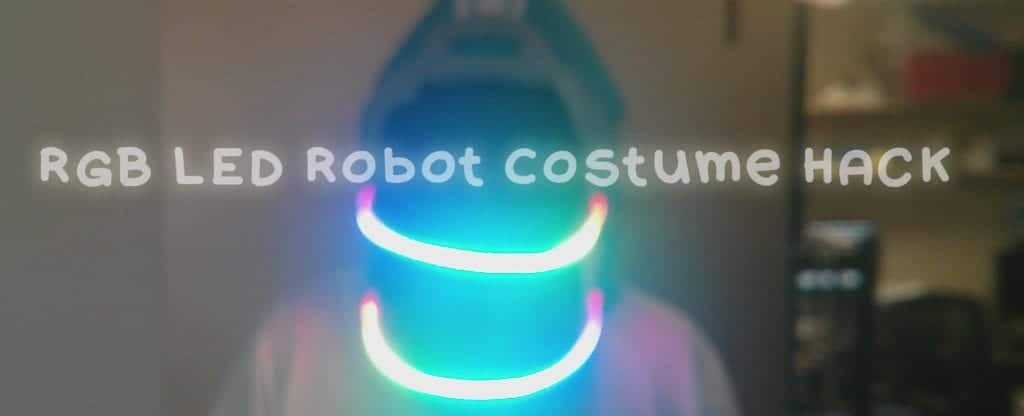
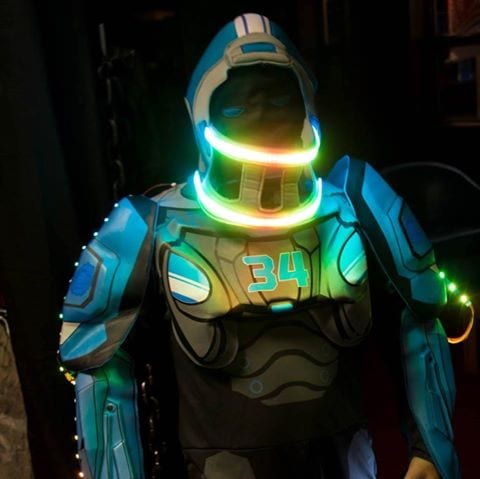
So for this third hack we started with an online-bought robot costume, but being a creative tech people, we couldn't resist making it better by using some brilliant LED strips that react to sound.
Supplies used:
- 3 x 5V RGB LED Stripxels WS2812B (30 per meter)
- 1 x 5V RGB Addressable LED strip, 1M (144 per meter)
- 1 x MEMS Microphone Board
- 1 x PJRC Teensy USB Board, Version 3.2
- 5 x Losi Micro-T MX2.0 2-pin connector set, wired
- 2 x Lithium Polymer Battery - 2000mAh (Lipo)
The Teensy was chosen because it has hardware based Fast-Fourier-Transform optimizations, and lots of memory.
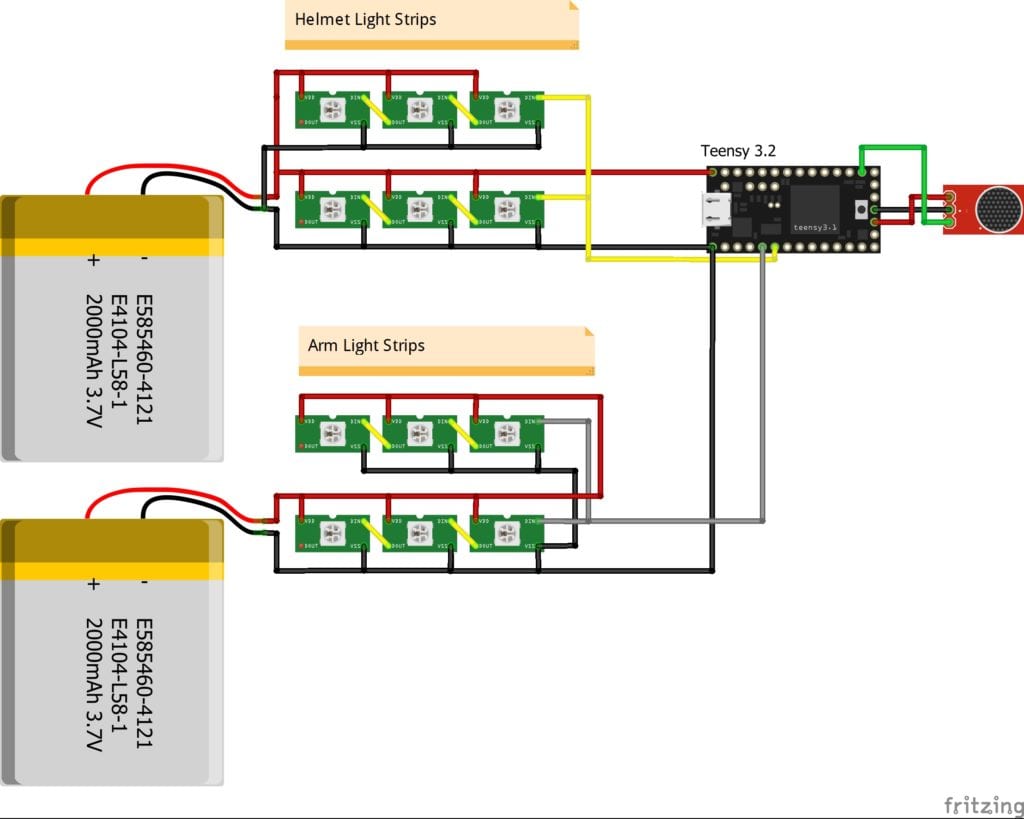
The dense LEDs (144 per meter) were used on the helmet. More spaced apart (30 per meter) were used on the arms. All of them drive from one Teensy receiving analog signal from the microphone located in the helmet. The microphone captures both the voice of the wearer and ambient sounds.
Here's what it looks like reacting to the music:
Technical Build:
The idea was to attach two denser LED strips to the face mask guard and the rest to the arms of the costume. They both would react to ambient sound and light up depending on the frequency of sound. The helmet's strip would have the lower frequencies in the middle and the arms would have them start at the wrists.
The face mask guard took 52 LEDs per strip and arms got 25 LEDs per arm. These calculations are reflected in the code below.
For the arms, I divided each LED strip into two sections (since the costume itself had separate foam pieces for forearm and shoulder), and gave them their own battery. That allowed me to have a simple 2 pin connection for joining the arms to the helmet.

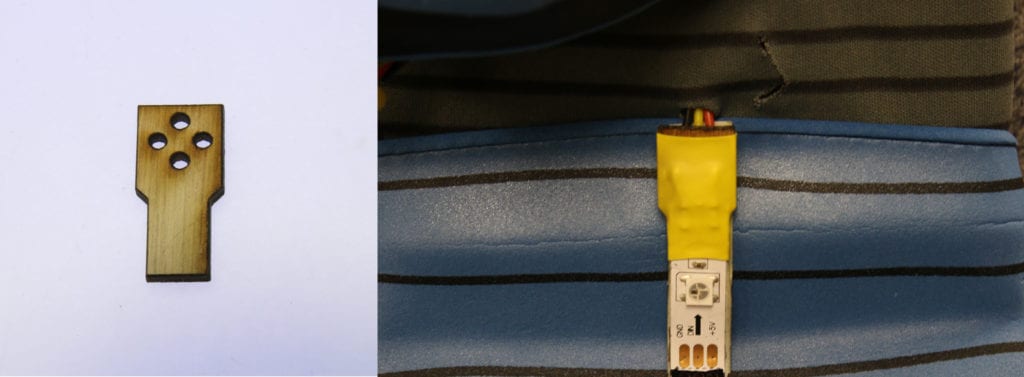
One problem when dealing with RGB Strips on wearables is that the solder pads are small and the wires break off too easily. I tried to minimize this by adhering a small wooden backing to the end of each strip. This acts like a cast and, when sealed with heat shrink, immobilizes the connections. I cut the supports on the laser cutter, but you can use anything. Popsicle sticks would work as well.

Here is the basic wiring diagram I used:

Software:
This code uses hardware support for FFT that's built into the Teensy. If you want to use a different processor, you will need to add a FFT library and modify the code accordingly.
I found some code online that was almost perfect for this project. Rather than reinventing the wheel, I reused that code, and modified it for my needs. Original credit has been left in the code.
Summary:
With Halloween just around the corner, this costume should be a hit at any event.. I can't wait to wear it!

photo credit Lucky Shot (David Luckman)
MORE POSTS
Hah! I told you! I told you! But did you believe me? NooOooOoooooOooo. What am I blathering on about, you ask? Well, we finally now have all the PICAXE Starter Packs available with USB cables instead of serial. There are four new bundles in total: PICAXE-08 Starter Pack (USB) PICAXE-18 Tutorial Kit (USB) PICAXE-18 Starter […]
We are so historical here, that we are going to be closed for Heritage Day - Monday August 4th. Never fear we'll be back on Tuesday 5th! No orders will be processed or sent out on that day, but we will be shipping on Tuesday. Cheers, Solarbotics Team!
Inspired by the Ice Bulb published on Instructables, we decided to create our own version. Ice bulb suggests that we use a balloon to shape the ice and before it freezes, add an LED so that it can glow. Since we decided to use a whole bunch of LEDs (on a string), we opted to […]
Solarbotics, Ltd. is not responsible for misprints or errors on product prices or information. For more information, please see our Terms and Conditions.
Warning: This product contains chemicals known to the State of California to cause cancer and birth defects or other reproductive harm.
Please visit www.P65Warnings.ca.gov for more information. This item was manufactured prior to August 31, 2018.

