...oh, just save the Republic! Just got this note in from Rob Meyer, who is using 3 of our GM15 pager gearmotors to drive his 1/18 scale R2-D2. Given that the real R2-D2 measures 108cm tall, that makes this cute cousin only 6cm (2.36") tall! There's a GM15 for each of the drive wheels, and […]
Rick and Morty Portal Gun
Dilan Tuff-Overes
January 25, 2018
Every year a group of my friends have an engineering Secret Santa. The rules are simple: make something cool for under $20 that requires engineering to complete. In years past we’ve seen Google cardboard VR headsets that are 6DOF, match stick rockets, 3D printed fans that explode when used, 3D printed rockets with cardboard launch controls, and a host of other semi dangerous, partially completed projects that are more than a little interesting.
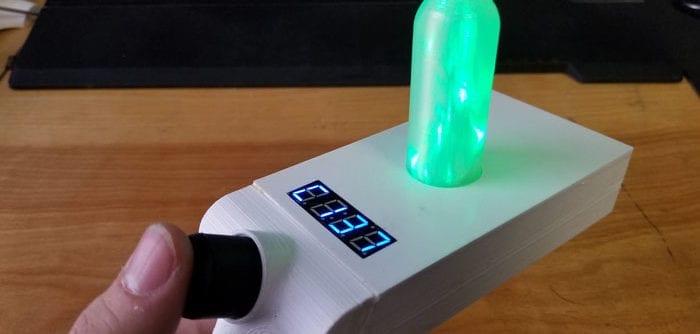
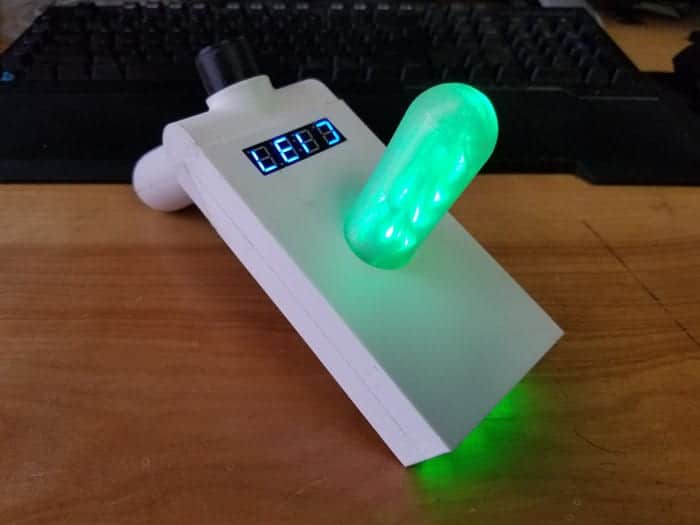
This year I decided to create a portal device from the Popular Adult Swim show Rick and Morty. The device opens portals from one dimension to another by spinning a knob to select the target dimension number on a 7-segment display. With a background in electrical engineering, I thought that this was an excellent project to start tinkering on! Plus, the 3D printer needed a workout.
Parts List
• 1x Rotary Encoder
• 1x 7-Segment Serial Display
• 4x 10mm Green Diffused LED
• 1x 4.5m Green LED String
• 1x 2xAAA Battery Holder
• 5.0V Micro Boost Regulator
The Build
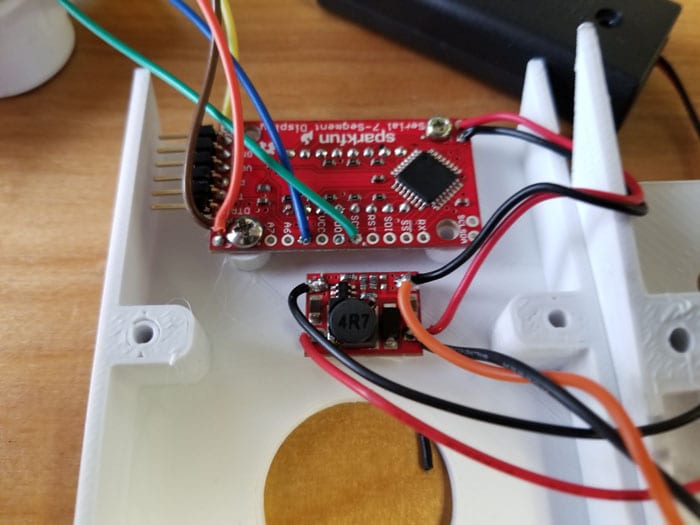
I based this build on Sparkfun's 7-Segment Serial Display, which has the desirable feature of being designed around the ATmega328P, a.k.a. the Arduino chip. I replaced the stock library that controlled the 7-segment display with my own, allowing me to use the excess power to control my project's logic flow.
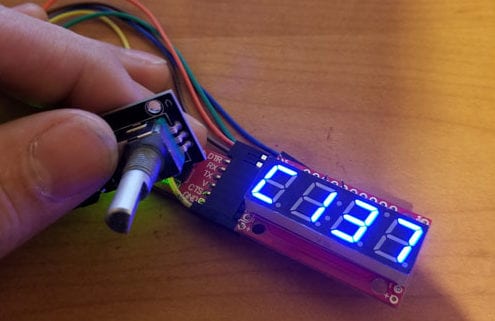
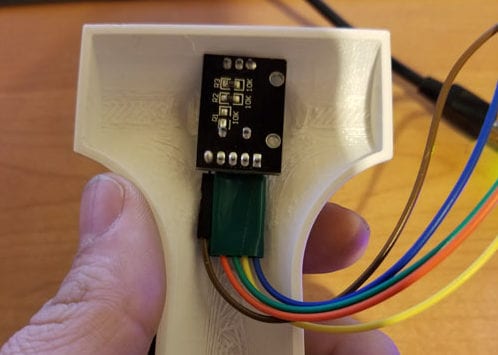
To mimic the functionality of the portal device in the show, I combined the 7-segment display with a rotary encoder. I used a library online to read the grey code of the encoder and turn it into a basic clockwise/counter clockwise selection knob. The encoder's wheel also acts as a button for simple spin/set operation (seen above, showing the default dimension, C137).
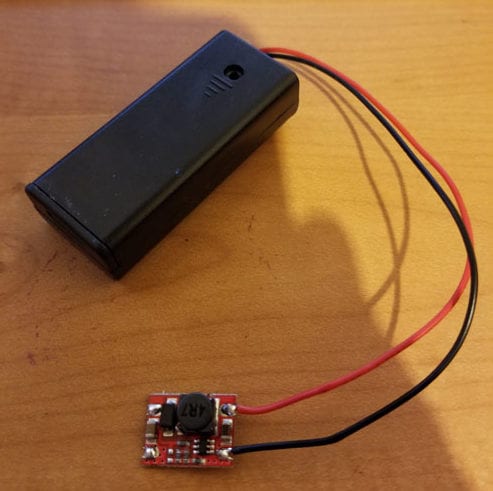 Power comes from a simple AAA battery pack with built-in on/off switch & pre-tinned leads soldered to a small 5V boost converter used to power the 7-segment, processor, and LEDs.
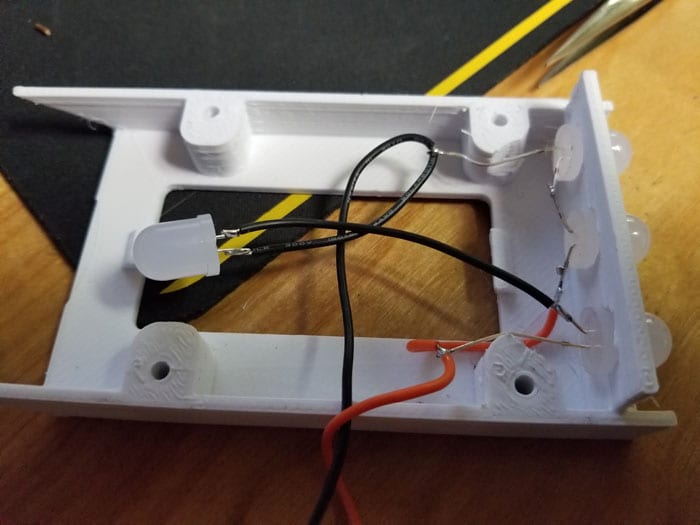
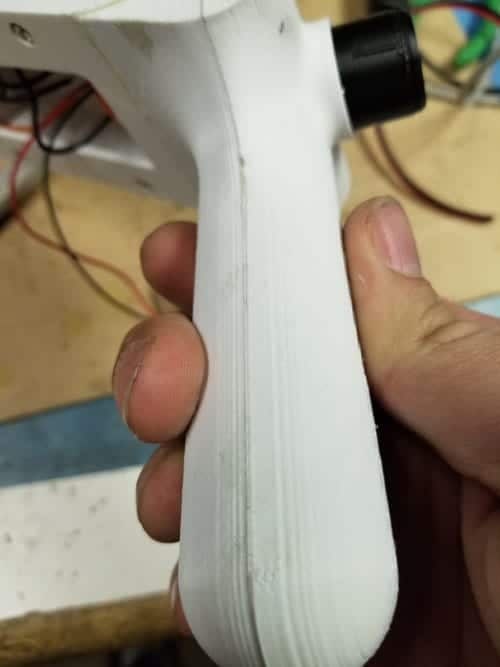
Although there are 3D STEP files online, I designed up my own implementation of the portal device in Solidworks before printing them on our Kossel Delta 3D printer. The CAD files need polish before we release them to a 3D repository, and we'll update the blog entry when they're available.
The large 10mm green LEDs round out the effects nicely. LED voltage drop calculations showed wiring them up 2 in series, 2 in parallel for a nice green glow without requiring current limiting resistors.
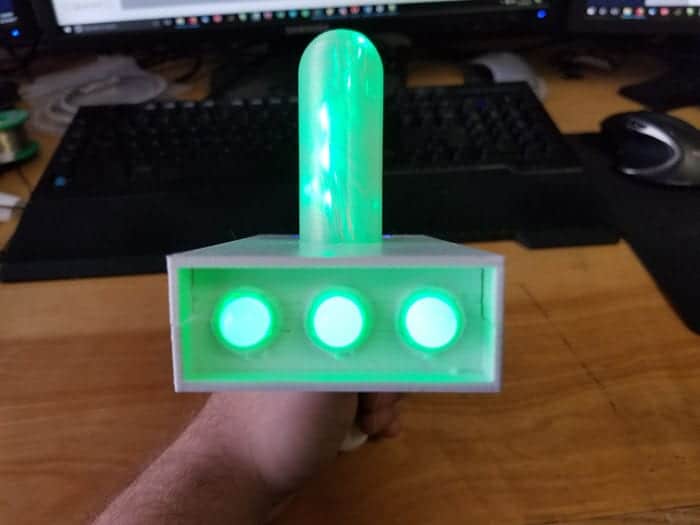
To enhance the glow to the top tube, SuperFlex LED strings were wired directly to the 3V battery source and stuffed unceremoniously into the tube. And as with all quick DIY projects, everything was assembled into the portal device with superglue.
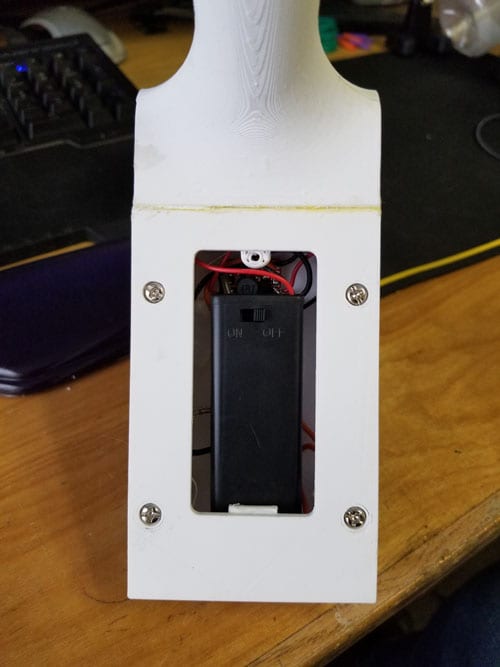
The last step of the build was to add a little door at the bottom of the portal device so that the battery pack can be accessed.
Although not quite perfect, it turned out rather well considering I only had two sleepless nights to get it ready. Revision 2 requires adjusted CAD files, a wiring schematic, and better matched tube/front LED colors.
C'mon Morty - there's something I need you to do....
MORE POSTS
Turbot Winners...
New updateWe've got confirmation from all three Turbot winners! They are: Scott Williams of New Jersey, USA, and... Amin Younes of New York State, USA! Emiel Roumen of the Netherlands! ps: Turbot kit looks like it'll be ready real soon!
Maker Faire Arduino Workshop, LoL Shield...
Psst. Hey. You. I have a secret. A secret we want everyone to know about. But only the people going to the San Fransisco Maker Faire. The word 'free' is a pretty good word, right? Let's throw 'Arduino' in there too. We may be onto something here... How about 'workshop', just for good measure? Those […]
Solarbotics Halloween PumLantern Hack
This is a message that does not announce Halloween a stat holiday at Solarbotics - but enhances the Halloween spirit by bringing you a fancy porch or window decoration idea. We call it the Pum-kin-Lantern! Here's an easy recipe: take the guts of Pum Lantern, place it in a mixing bowl with some pumpkins, add […]
Solarbotics has been operating for more than 25 years, bringing electronics know-how and supplies to both the electronics professional and hobbyist. We'll be happy to help you too!
Solarbotics, Ltd. is not responsible for misprints or errors on product prices or information. For more information, please see our Terms and Conditions.
Warning: This product contains chemicals known to the State of California to cause cancer and birth defects or other reproductive harm.
Please visit www.P65Warnings.ca.gov for more information. This item was manufactured prior to August 31, 2018.