Well, we've been back for a few weeks now, and the demobots still have to be unpacked. It was a blast. From what we understand, attendance was up almost 50% over last year. Traffic was backed-up from the local highway to the fairgrounds. There were LOTS of new exhibits. We should know - we've been […]

Motion Activated Tree Lights
Solar botics
November 13, 2015
In compliance with the upcoming holidays we decided to contribute to the obligatory dose of Christmas ornamentation in the shape of the well-known coniferous tree. A tabletop freestanding tree with LED strings and a flashing star on top seemed like an easy enough thing to do. We also wanted to add a tech twist to it and thought that it would be nice for the LED lights to react to motion and light up when someone approaches the tree.
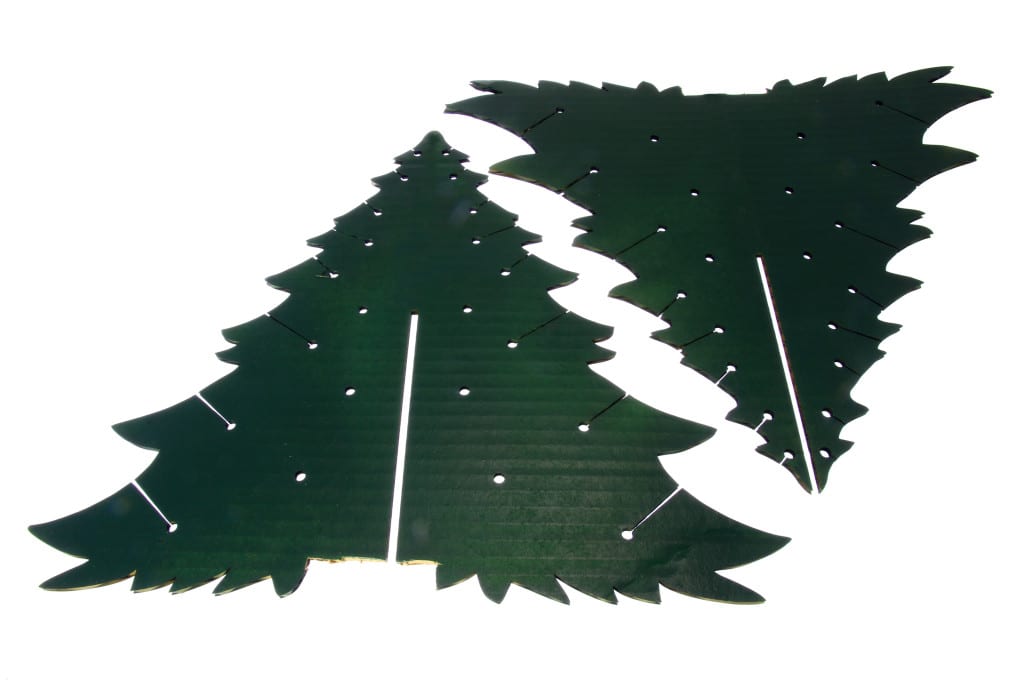
First, cut out the tree shape out of whatever cardboard you have on hand, we had 3mm corrugated from broken down boxes. I used this image for reference and omitted the top ornament as we are going to make one of our own.
We are making a 3-dimensional tree, so other than the shape itself you will need to duplicate the initial shape and add narrow vertical cutouts down the middle. The circular cutouts are for threading the LED strings through so you can drape them nicely. Here are the layout files for the image below (svg).
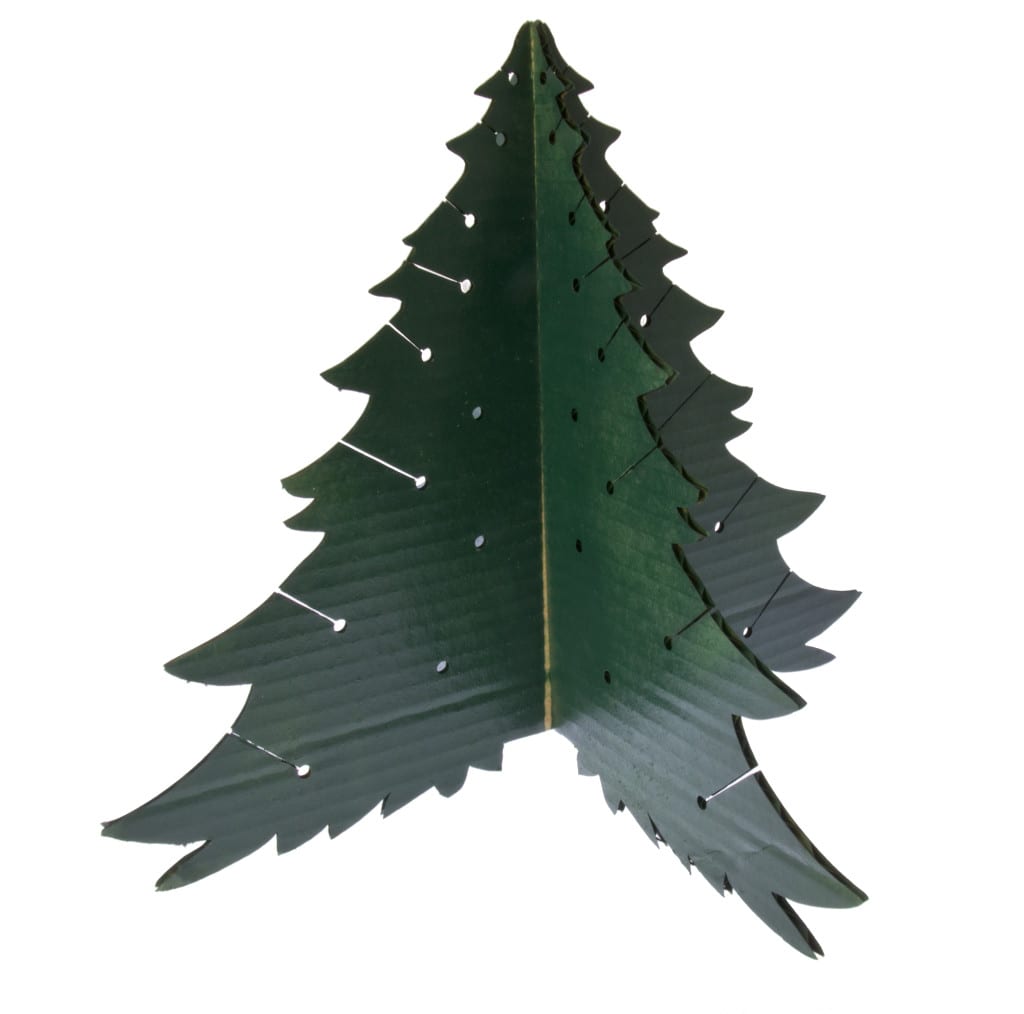
 The photo shows the cardboard already spraypainted - assuming you want a green tree, not craft cardboard-colored. Once the paint is dry you can put the structure together as shown:
Now wrap LED string around the tree in some resemblance of order. We tried it at least 3 times until we arrived to a satisfactory pattern that didn't look like it was made by a drunk finch angry at the fact that it has to deal with wire and not grass. For the tree that stands about 30cm (1ft) high we used 2 90-LED 3 meter strands in colors red-green-blue.

Another part of the decoration is the treetop star. We wanted to keep the construction (relatively) simple without employing any fancy apparatus like 3d printers. So I cut out two identical star-like shapes out of a milk jug plastic and sandwiched a piece of vellum between them. It is held together pretty well with lots of CrazyGlue.

The combination of opacities in milk jug plastic and vellum works well backlit by the sun...

.. and with the RGB LED that it is intended for.
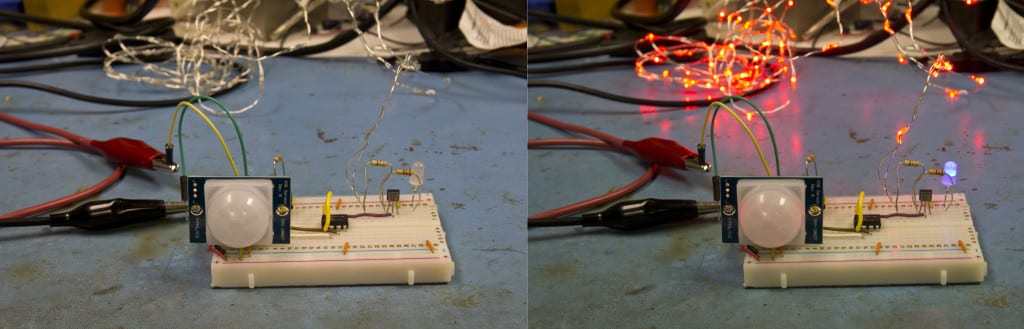
It would be an inefficient use of our time and just boring if we were to make a plain old cardboard tree, even with lights, so in order to make it a little more interesting we made it motion sensitive. Don't worry, the tree won't get sick in the car and spread glitter all over your car seat, and ask you to buy a consolatory raspberry pi after. Instead, we added a contraption that contains PIR sensor that lights up the LED string when it detects movement.
Here's the schematic:

Theory of Operation:
The signal coming out of the PIR sensor is a pulse that can source 15mA. That is plenty to charge Capacitor C1. R3 is a discharge control for C1 to allow controlled discharge of C1.
R4 is a voltage divider circuit and is adjustable. Both the charge from C1 and the adjustable input from R4 are fed into the LM386 OP amp. This (operational) amp is configured as a comparator.
When the voltage on pin 3 exceeds the voltage on pin 2, the output on pin 5 will be high. When the voltage on Pin 2 exceeds the voltage on pin 2, the output on pin 5 will be low. Pin 5 is connected to the gate of Q1, a FET to allow higher current to flow.
And here's what the final product looks like:
Considering building something similar? Here are all the electronic bits and pieces that we've used:
1 x 5mm RGB strobe LED
1 x 10k Resistor
1 x 1.0k Resistor
1 x ZVN2106 FET
1 x Audio Op-Amp
1 x 20k Multi-turn Trimpot
1 x Parallax PIR Motion Sensor (Rev B)
1 x 100k Resistor
1 x 330µF 16V Electrolytic Capacitor
2 x 3m 90 LED Strand with Battery Box
Or, if you prefer - add all of the items in one cart.
For other tools and supplies, you will need:
- a soldering iron
- some cardboard
- some semi-transparent material similar to the milk jug described above
- can of green spray paint
- box cutter knife (we couldn't resist the temptation and used lasers, sorry)
MORE POSTS
RC Brutusbot n' Communication Stuff
Help! It's getting colder outside and the trees are starting to shed all over everything. It's quite a mess. It's pretty, but a mess all the same. So we did what anyone would do in such circumstances - we made a small DIY tank platform wirelessly controllable, released a new breakout board, and put together […]
Closed July 1st for Canada Day
Did we forget to mention that we're currently closed for Canada Day? I think we did. So, yeah. We're not really around for the rest of today, but we'll be back in action tomorrow to return phone calls and emails and ship your orders. Now if you'll excuse me, I need to get back to […]
CES - Engadget's video of the RS2 &...
Engadget has a large (albeit short) video of the new RoboSapien V2, and a bit of the Robopet. Check it out!
Solarbotics has been operating for more than 25 years, bringing electronics know-how and supplies to both the electronics professional and hobbyist. We'll be happy to help you too!
Solarbotics, Ltd. is not responsible for misprints or errors on product prices or information. For more information, please see our Terms and Conditions.
Warning: This product contains chemicals known to the State of California to cause cancer and birth defects or other reproductive harm.
Please visit www.P65Warnings.ca.gov for more information. This item was manufactured prior to August 31, 2018.