Grove - Smart Plant Care Kit for Arduino CAD 85.28 / USD 59.90 A functional kit that helps monitor the environment and care for plant growth! 200W Buck Module CAD 22.00 / USD 16.90 When mini buck converters just won't do. Grove - Ear-clip Heart Rate Sensor CAD 16.80 / USD 12.90 Grove Heart Rate […]

DIY LED Fosshape Horns
Solar botics
November 17, 2016
A handy tutorial explaining how to put together the RGB LED Horns. Make your own, or get a kit with everything included (except for the paint).
Supplies:
Fosshape 300
2 x slow scroll RGB LED
2 x coin cell batteries
conductive thread
2 x coin cell battery holder - sewable
2 x pieces of velcro (hook side)
dimensional fabric paint (like this) - not included in the kit
Tools:
scissors
needle
heat gun
needlenose pliers
clear nail polish - optional
Step 1. Pattern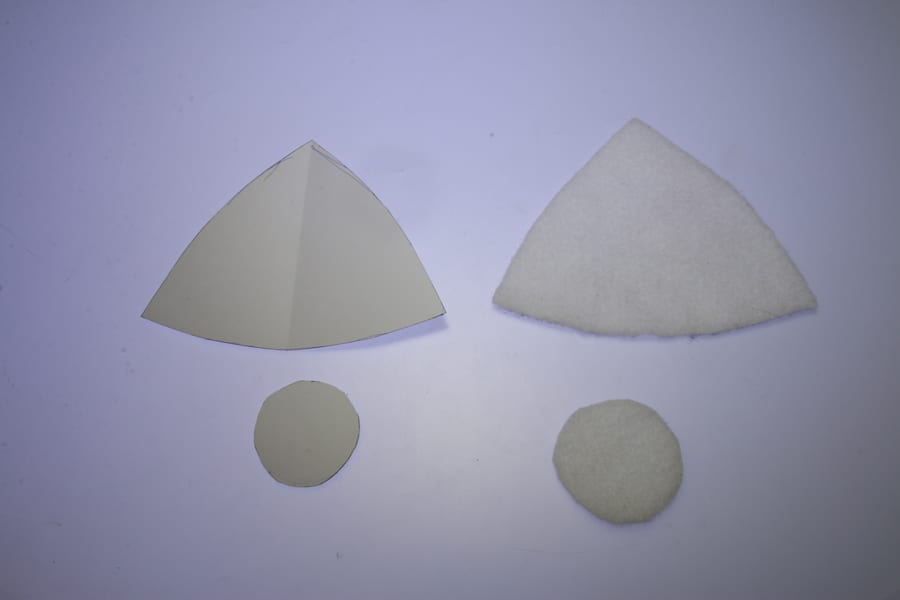 Cut out your own pattern - a simple triangle and a circle for the base.
Step 2. Shape the horn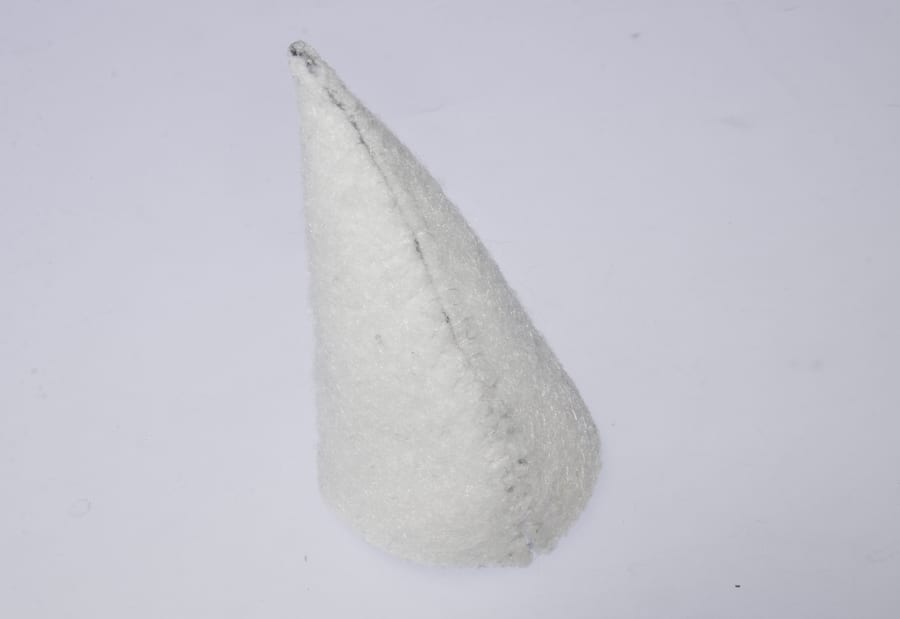 Sew the triangle along the long edge. Shrink and form it over the heat gun - make sure to watch the fabric, when heated too much it will melt and form holes. Instead of trying to form the hot Fosshape with your hands, the best way to harden the shape is to hold it above the heat gun making sure to heat it evenly and let it shrink. Shrink the bases too while keeping them flat, but don't sew them on yet.
Step 3. LEDs preparation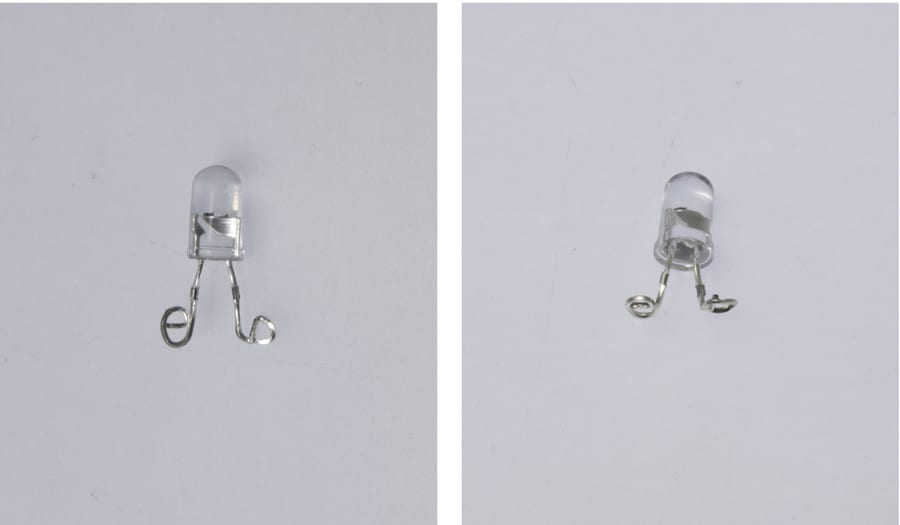 With needlenose pliers curl up the LED legs and bend them 90 degrees so that the loops sit flat when the LED is facing up.
Step 4. Battery holder
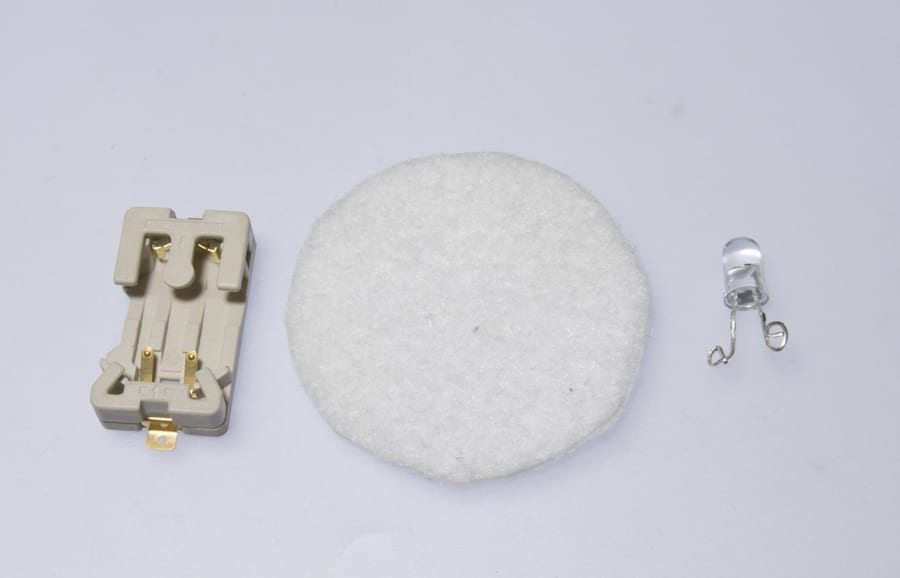
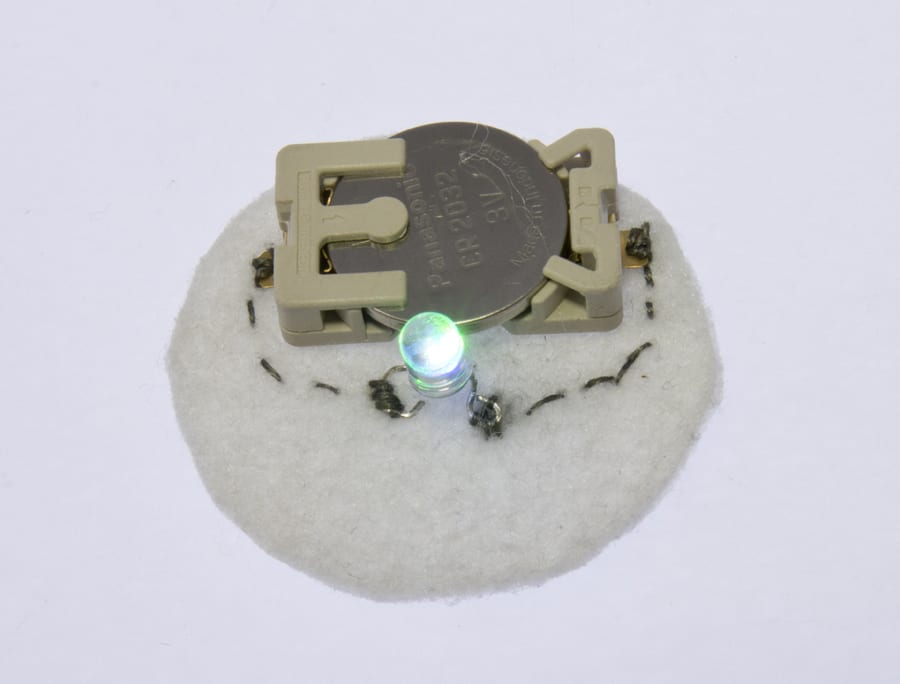 Grab the battery holder, a coin cell and the base and attach the LED using conductive thread. Make sure the polarity of LED and battery are correct. If everything is wired right the LED will light up.
Step 5. Sew the base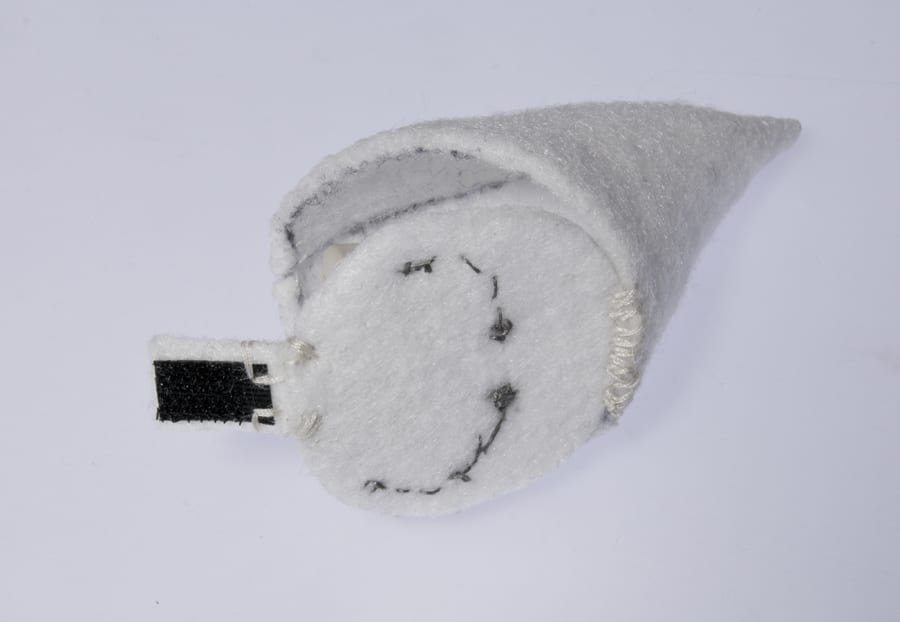 Sew the base to the horn like shown and add a little tab of Fosshape and Velcro to the opposite side in order to keep it in place. Paint some clear nail polish on the bottom of the horns to isolate the conductive thread from touching the metal of the hair clip. Alternatively, you can fluff up the small scraps of Fosshape and fuse them over the stitches to protect the conductive thread.
Step 6. Paint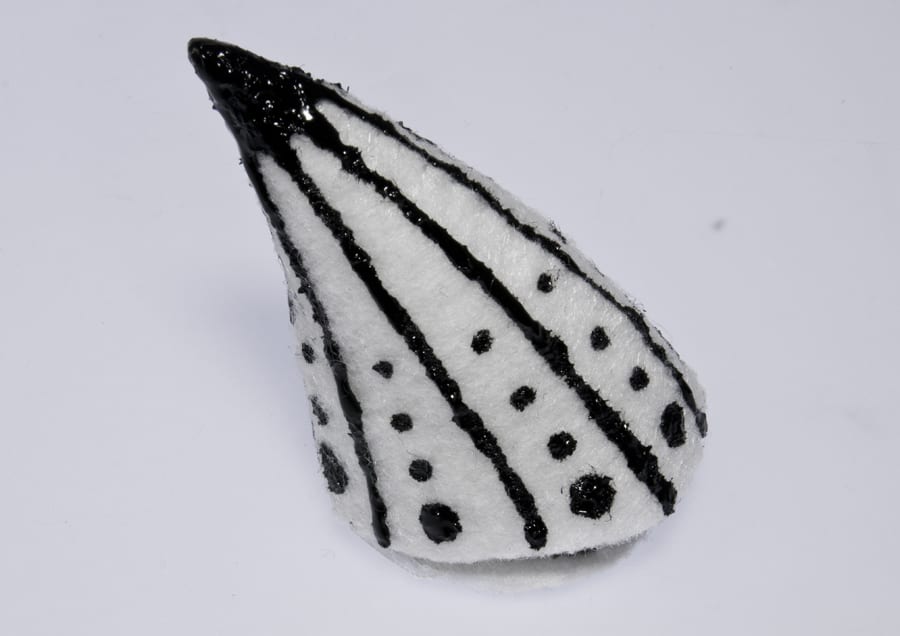 Embellish the horns with a pattern of your choice using the Tulip paint. It will take about 4 hours to dry. The Fosshape disperses the light quite nicely.
Step 7. Hair clip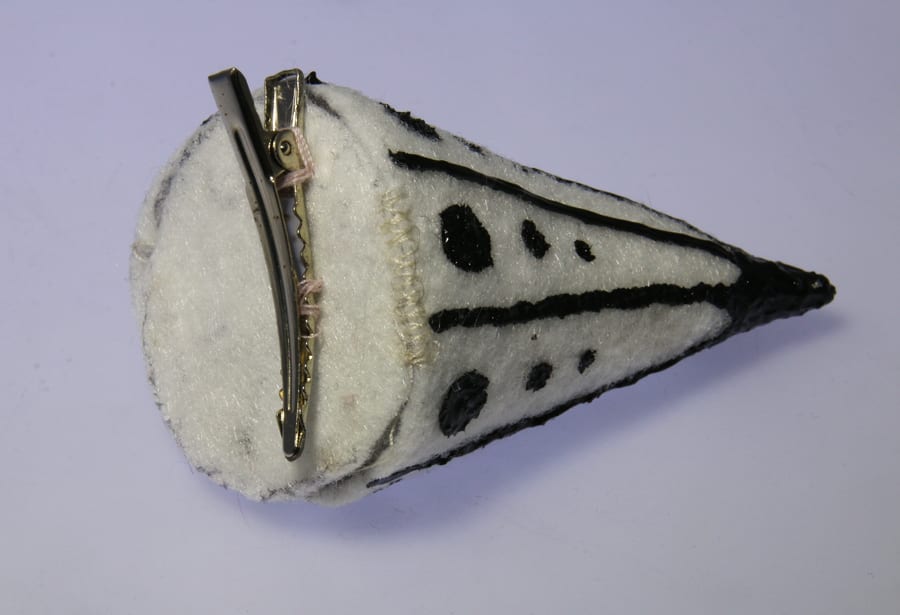 Hot glue the hair clips to the bottom of each horn. Alternatively, you can sew the finished horns to hair clips or a head band.
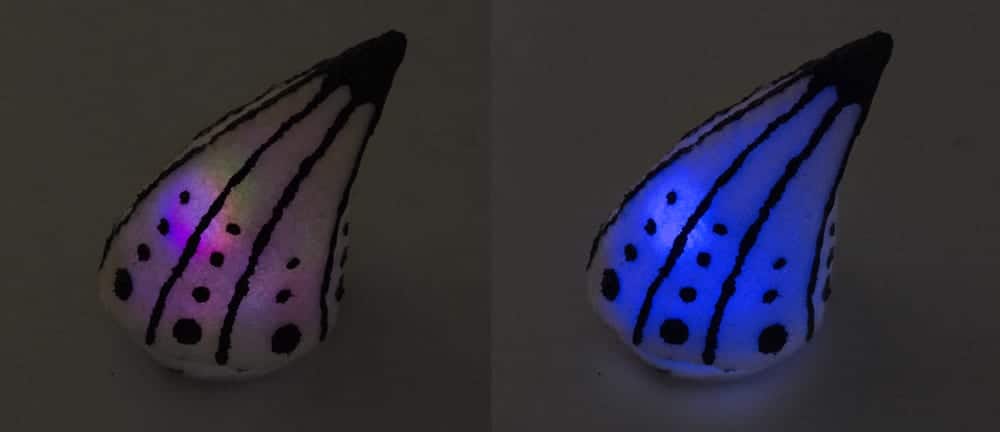
MORE POSTS
Phones are Down
Remember that time we said we were going to close for vacation, but our website and phones would stay on duty to take your messages? Well, it looks like the phones are revolting, and demanding time off immediately. Right now we're having issues with our office system, and we're unable to take calls. Please shoot […]
Friday New Product: LilyTwinkle, Teensy ...
It's Friday again, and it's been a busy (two) weeks since there was a new product. Wait no more, here it is. 4-Conductor LED Strip Clamp $0.95 Reduce the crazy soldering mess with these super useful RGB LED strip clamps! LilyTwinkle ATtiny85 $6.95 A preprogrammed controller board that can make your wearable project sparkle and […]
Winter theme, new distributor & Tha...
Just in time for the holidays we've come up with one more theme for the new HexPummer Lantern. Behold, the winter theme! It has a snowman, snow flake, a holiday tree and some holly to fulfill all your blinky festive needs. Better nab it quick - this design will only be around for a month […]
Solarbotics has been operating for more than 25 years, bringing electronics know-how and supplies to both the electronics professional and hobbyist. We'll be happy to help you too!
Solarbotics, Ltd. is not responsible for misprints or errors on product prices or information. For more information, please see our Terms and Conditions.
Warning: This product contains chemicals known to the State of California to cause cancer and birth defects or other reproductive harm.
Please visit www.P65Warnings.ca.gov for more information. This item was manufactured prior to August 31, 2018.