See, I was actually there! Well, at least there's proof that I was. Here's an interview with Bashiba Grossman, showing off her 3D printed artwork. About 1/4 the way in, you'll see a suspicious man show up in the background. Nice hat, eh? Thanks to Floyd on the BEAM-List for pointing this out!

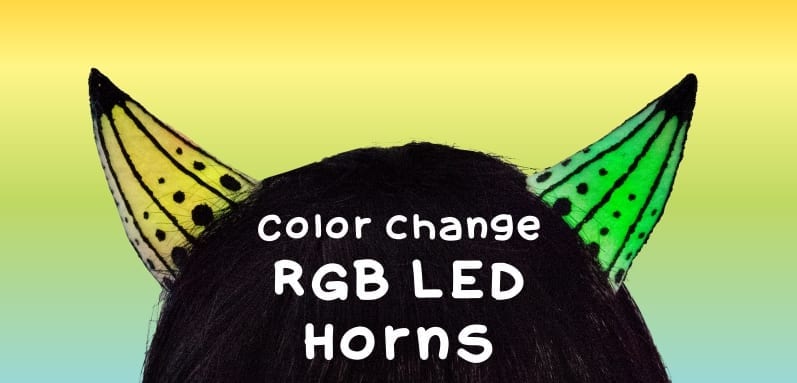
DIY LED Fosshape Horns

A handy tutorial explaining how to put together the RGB LED Horns. Make your own, or get a kit with everything included (except for the paint).
Supplies:
Fosshape 300
2 x slow scroll RGB LED
2 x coin cell batteries
conductive thread
2 x coin cell battery holder - sewable
2 x pieces of velcro (hook side)
dimensional fabric paint (like this) - not included in the kit
Tools:
scissors
needle
heat gun
needlenose pliers
clear nail polish - optional
Step 1. Pattern Cut out your own pattern - a simple triangle and a circle for the base.
Step 2. Shape the horn Sew the triangle along the long edge. Shrink and form it over the heat gun - make sure to watch the fabric, when heated too much it will melt and form holes. Instead of trying to form the hot Fosshape with your hands, the best way to harden the shape is to hold it above the heat gun making sure to heat it evenly and let it shrink. Shrink the bases too while keeping them flat, but don't sew them on yet.
Step 3. LEDs preparation With needlenose pliers curl up the LED legs and bend them 90 degrees so that the loops sit flat when the LED is facing up.
Step 4. Battery holder

 Grab the battery holder, a coin cell and the base and attach the LED using conductive thread. Make sure the polarity of LED and battery are correct. If everything is wired right the LED will light up.
Step 5. Sew the base Sew the base to the horn like shown and add a little tab of Fosshape and Velcro to the opposite side in order to keep it in place. Paint some clear nail polish on the bottom of the horns to isolate the conductive thread from touching the metal of the hair clip. Alternatively, you can fluff up the small scraps of Fosshape and fuse them over the stitches to protect the conductive thread.
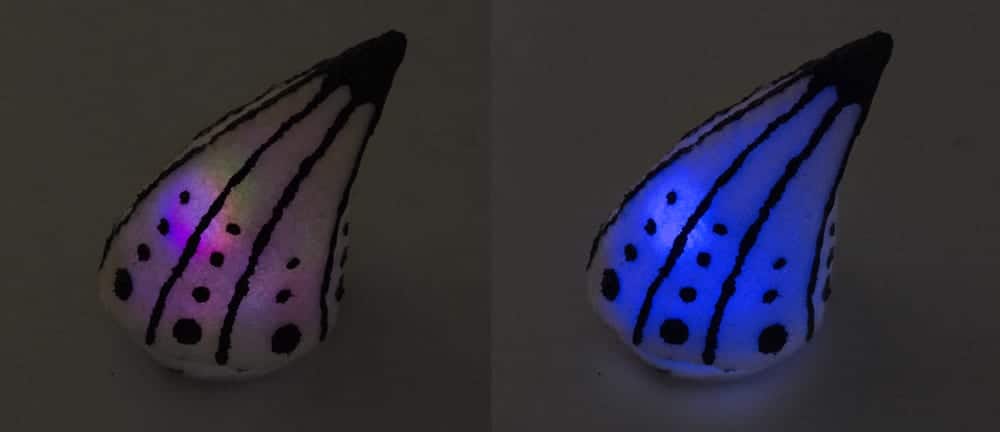
Step 6. Paint Embellish the horns with a pattern of your choice using the Tulip paint. It will take about 4 hours to dry. The Fosshape disperses the light quite nicely.
Step 7. Hair clip Hot glue the hair clips to the bottom of each horn. Alternatively, you can sew the finished horns to hair clips or a head band.
MORE POSTS
Here's a great booklet to accompany any new Freeduino purchase - "Getting Started with Arduino", written by Massimo Banzi (the co-founder of the Arduino Project). This title is based on his free-download introduction PDF, but takes is much farther, guiding new electronics enthusiasts into how to use the Arduino / Freeduino in a project. Also […]
...oh, just save the Republic! Just got this note in from Rob Meyer, who is using 3 of our GM15 pager gearmotors to drive his 1/18 scale R2-D2. Given that the real R2-D2 measures 108cm tall, that makes this cute cousin only 6cm (2.36") tall! There's a GM15 for each of the drive wheels, and […]
Mini-360 DC-DC Buck converter $3.70 Super compact and capable, this DC-DC buck converter can knock down a voltage from 23V to as low as 1V with up to 95% efficiency. Wonderflex Heat-activated Composite Plastic Sheet $79.00 This is a heat-activated, formable polyester plastic sheet that is very popular in making prop armour and other rigid […]
Solarbotics, Ltd. is not responsible for misprints or errors on product prices or information. For more information, please see our Terms and Conditions.
Warning: This product contains chemicals known to the State of California to cause cancer and birth defects or other reproductive harm.
Please visit www.P65Warnings.ca.gov for more information. This item was manufactured prior to August 31, 2018.

