Just a quick addition for now - there was a link submitted from the BEAM mailing list regarding Rod Brooks' papers at MIT. Some very worthwhile reading for those long, summer afternoons in the shade... Read More...

DIY Halloween RGB LED Kitty Ears
Solar botics
October 10, 2016
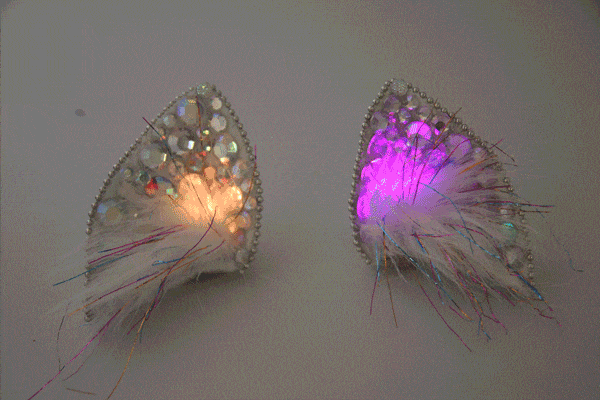
Simple cosplay cat ears made out of Fosshape, decorated with rhinestones and complete with RGB LEDs for color changing effect.
Materials:
- Fosshape 300
- 2 x slow scroll RGB LEDs
- 2 x CR2032 coin cell batteries
- 2 x coin cell battery holders
- 100 flatback rhinestones
- 2 x hairclips
- fake fur
- steel ball chain
Tools:
- scissors
- heat gun/steamer
- glue gun
- needle and thread
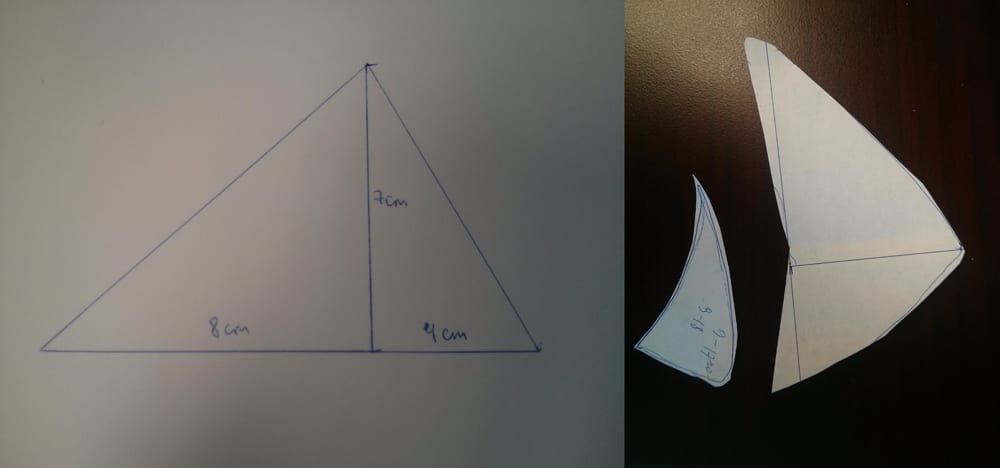
Step 1: Cut out the paper template
Define the height you want the ear to be - by holding a ruler up to you head (highly scientific approach) - and build a triangle similar to shown. You can use these shown measurements as a guidelines - but your proportions might be a little different.
Adjust the shape to have the curves following a more natural outline of the ear. Cut out the paper triangles..
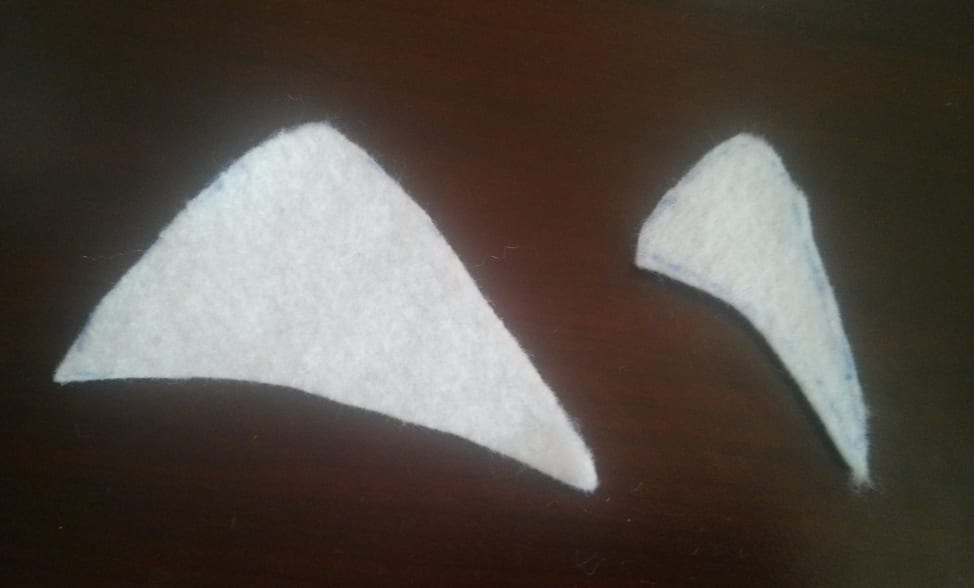
Step 2: Cut out Fosshape
Trace the template onto the Fosshape. Cut out 2 large shapes and 4 smaller shapes for the base of the ear (two bases per ear).
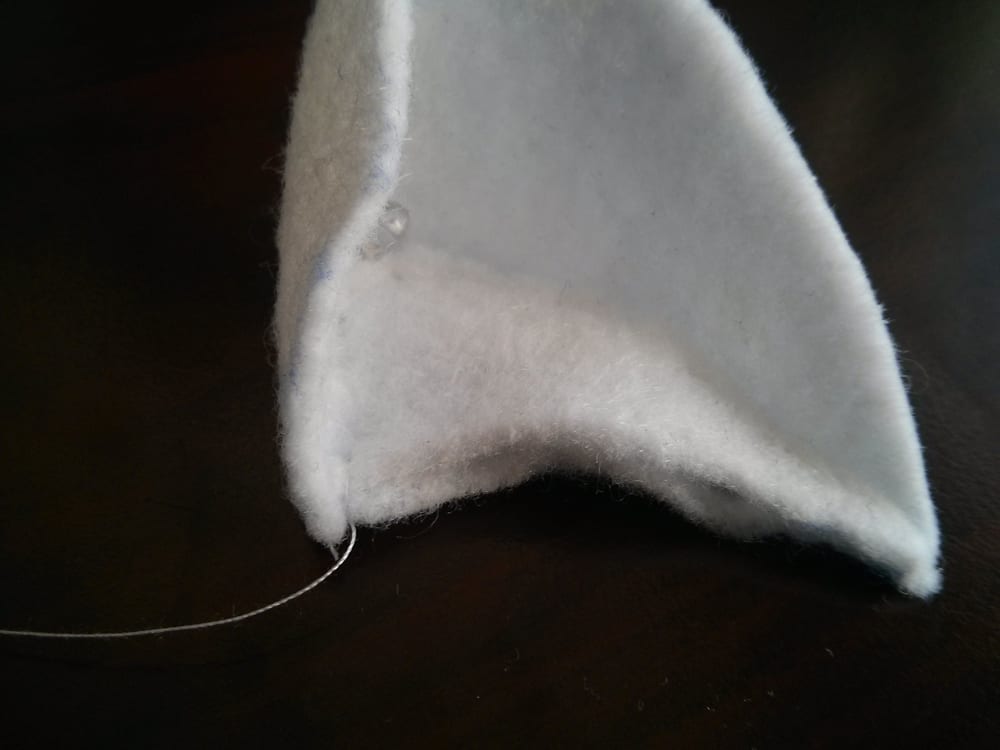
Step 3: Sew the ear parts together
Sew each ear shape to one base:
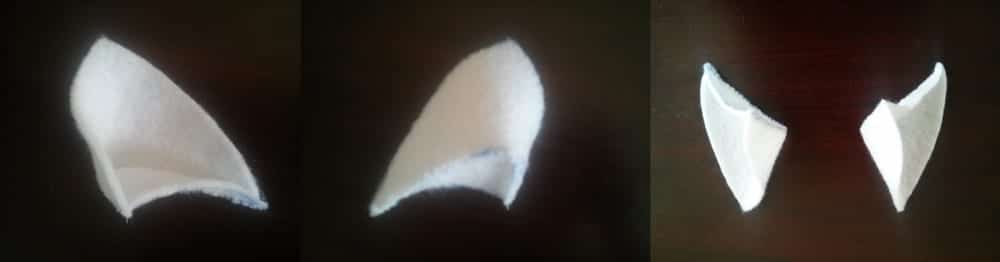
Step 4: Harden the Fosshape
Now shape and harden the ears using a steamer or heat gun. They will shrink about 1.5 times (left ear treated with heat and right one not yet shown for comparison), so take that into consideration when choosing the final product size.
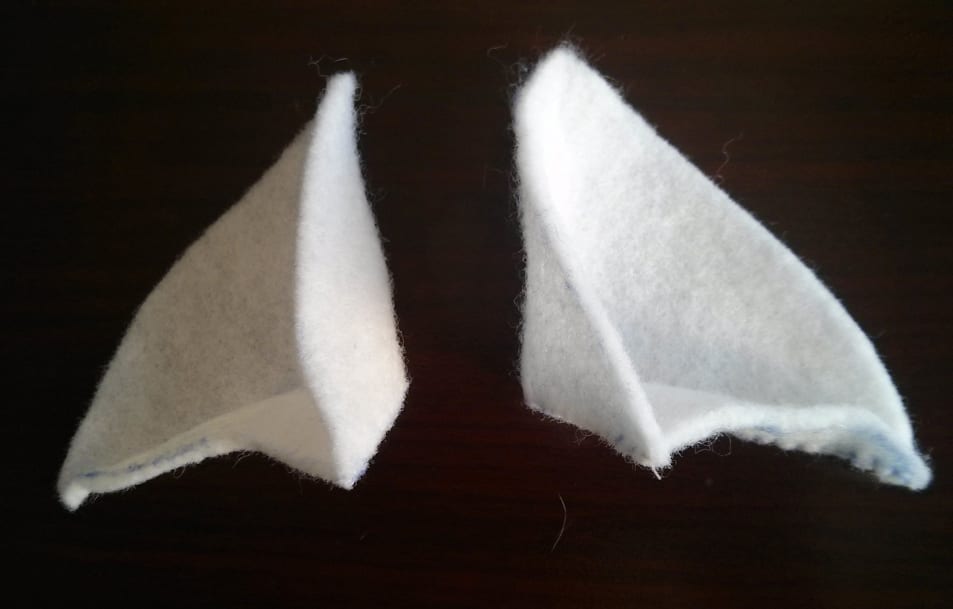
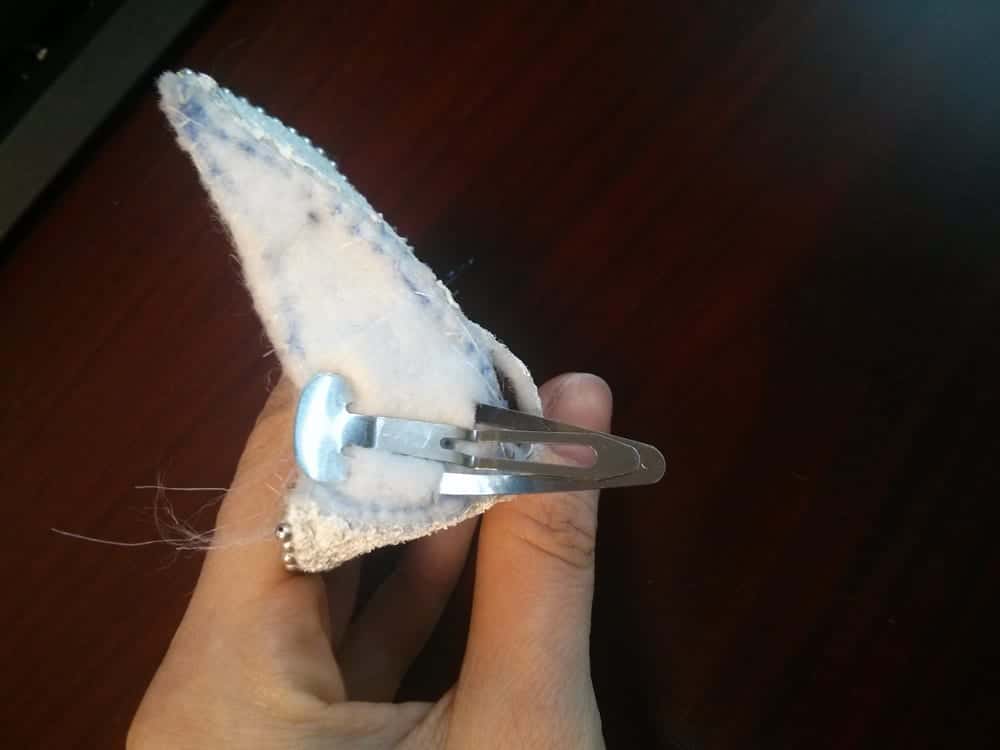
Step 5: Attach the hair clip
Sew the second bottom to the ear and insert the hair clip. Heat shrink the bottom layer.
Step 6: LED
Insert the LED into the inside of the ear with legs poking out from the other side.
Step 7: LED Battery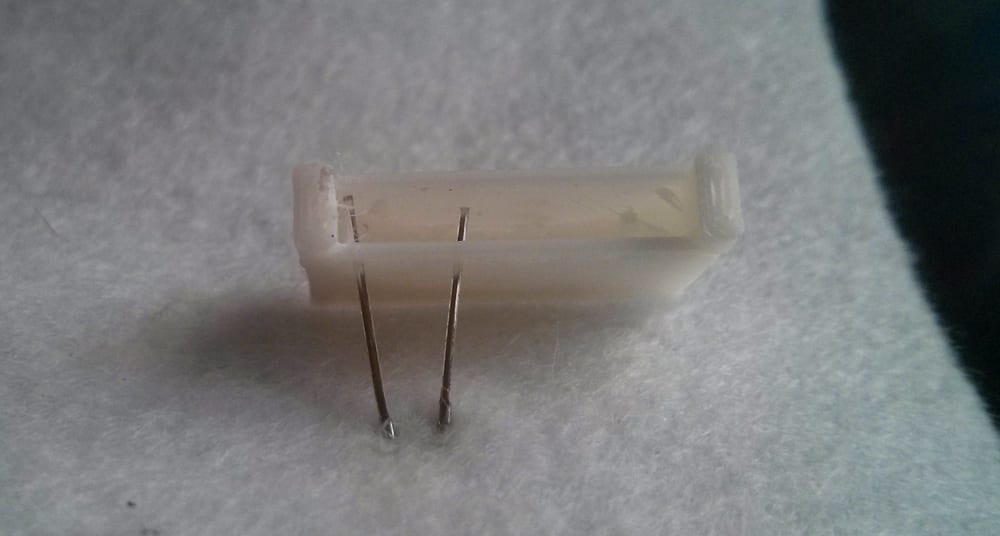
Insert the legs into the battery holder so that the longer (positive) leg is closer to the outside.
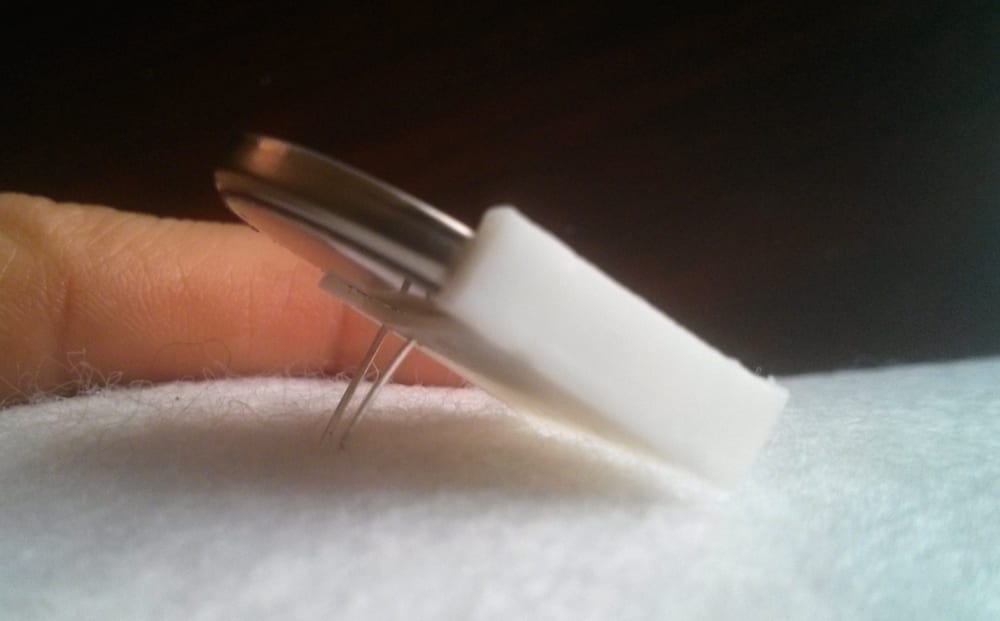
Insert the battery (positive side facing out) - it should be very snug. If everything is done correctly, your LED should light up right away. If not, then readjust the LED legs until the light is on.
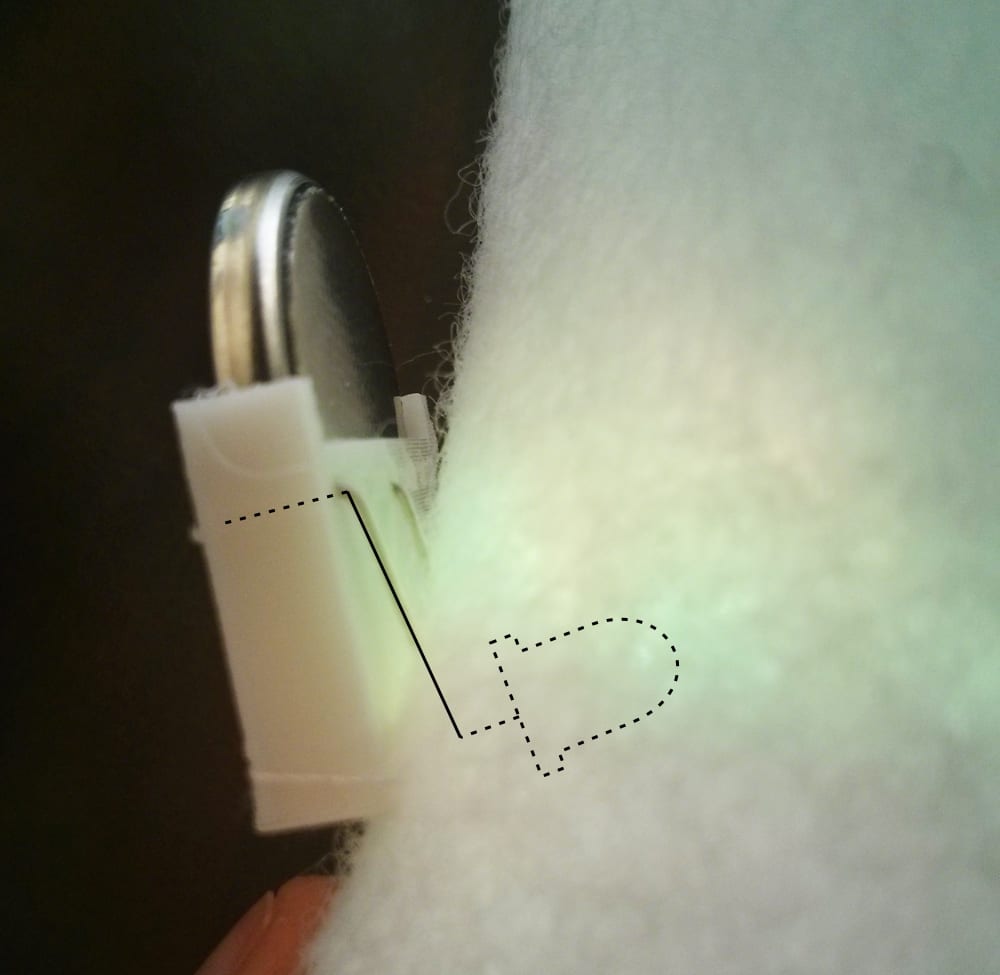
Bend the LED legs as shown above, kind of in a Z shape: 1st bend near the top of LED, towards the top of the ear, and second the opposite direction so that the whole contraption sits flat against the surface.
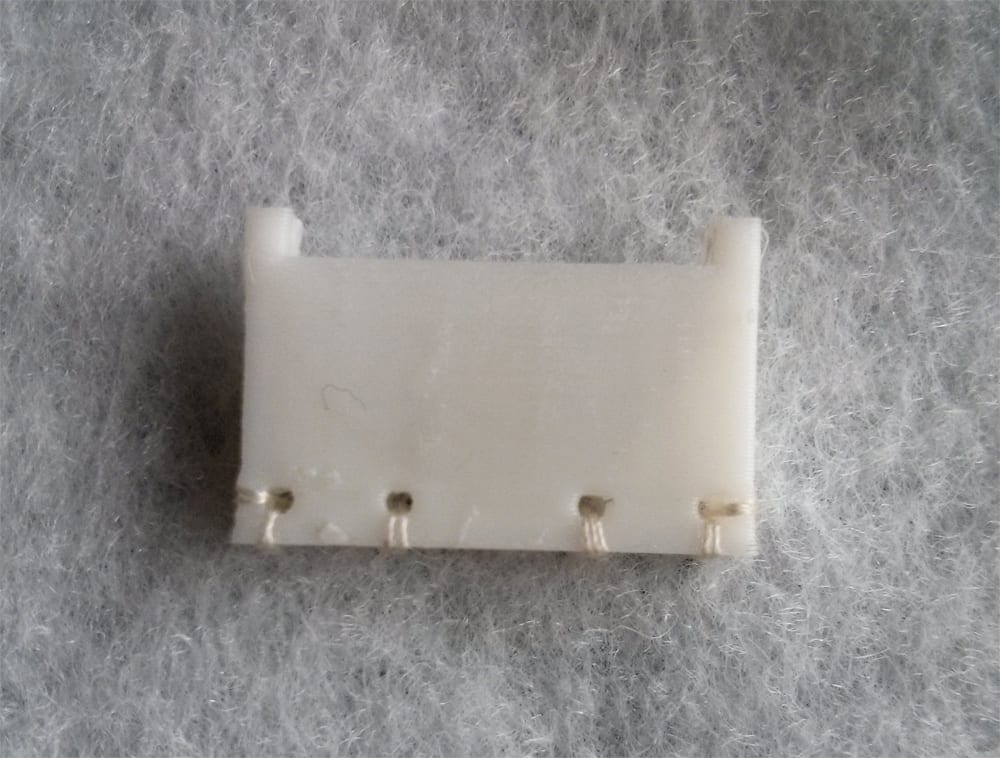
Stitch the holder down using the holes provided. Use some hot glue to secure the holder to the fabric if needed.
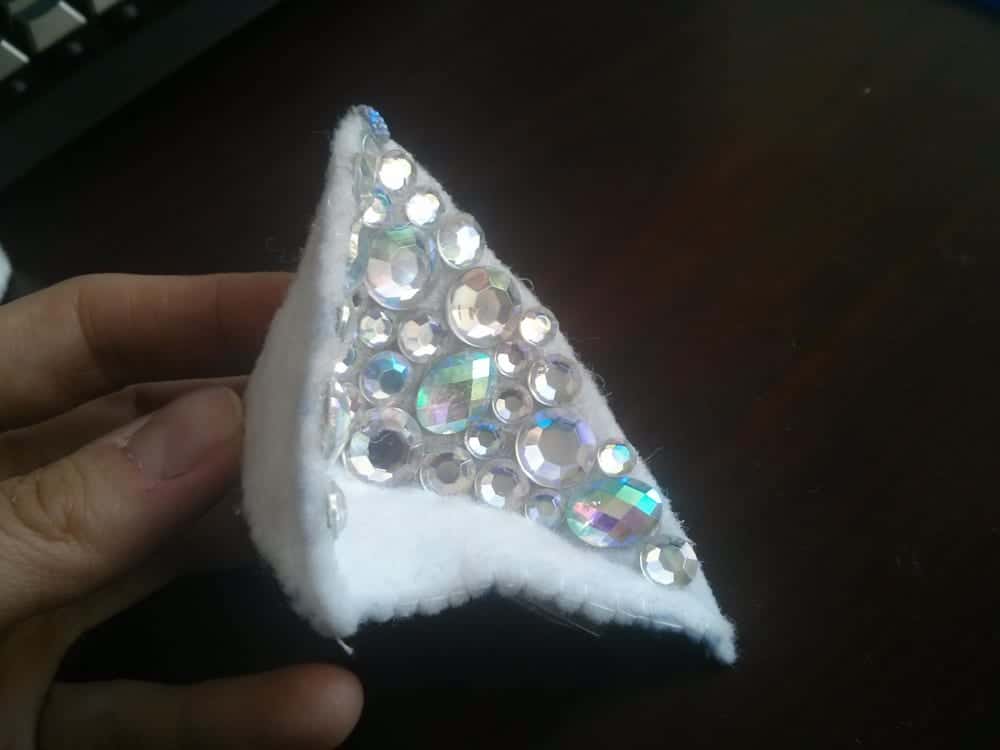
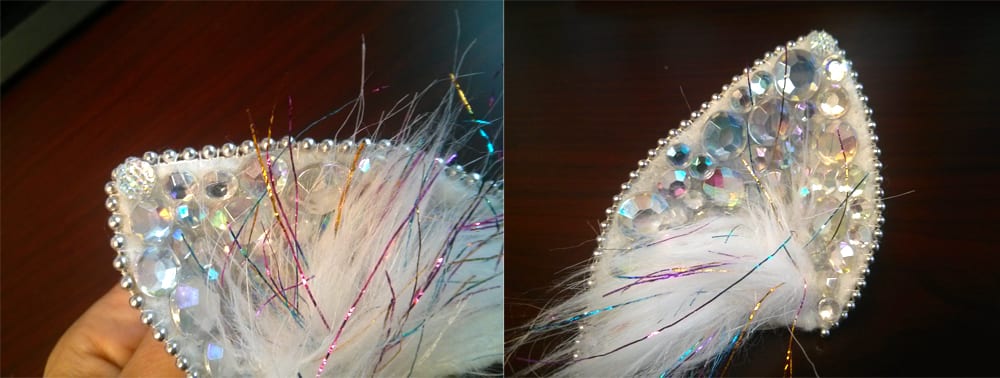
Step 8: Rhinestones
Now the fun part - use hot glue to attach the flatback rhinestones to the inside of the ear.
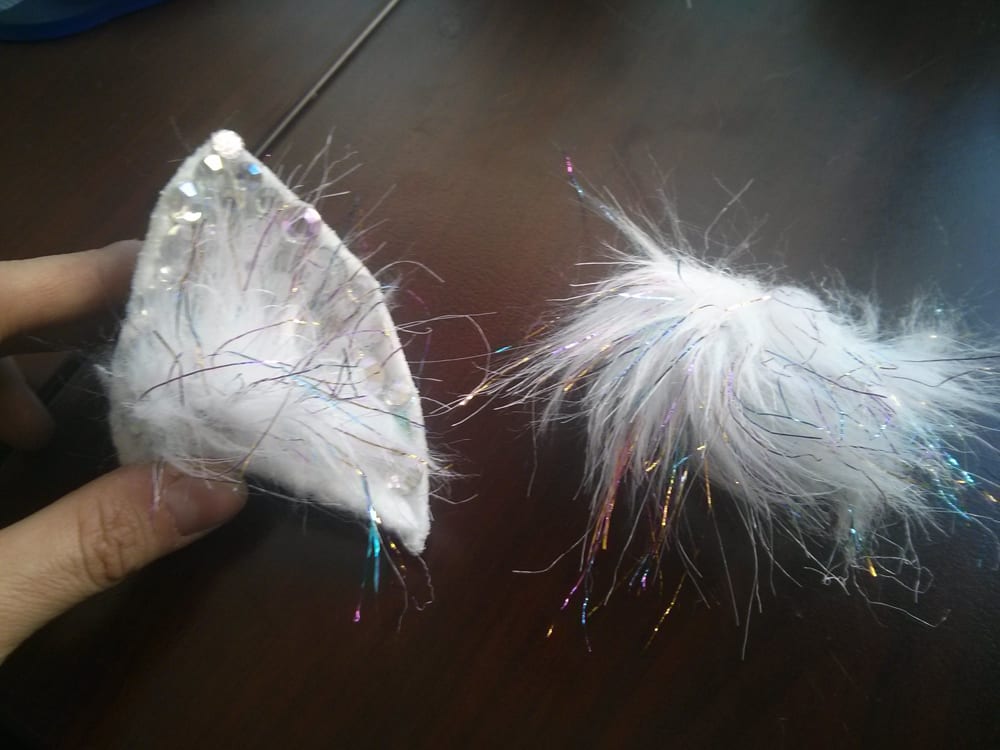
Step 9: Fur
Use small tufts of fake fur to disguise the bottom of the ear. Sew them in place.
Step 10: Finishing
Optional - use some cord/ribbon (in this case a ball chain) to finish the ear edges!
MORE POSTS
Diodes, Trimpots
Happy October everyone! The leaves are falling and there's that crisp scent of winter lurking in the air. Ah, it sure is beautiful! And you know what else is beautiful? Diodes and trimpots, of course. Check out these gorgeous new components: 3.4V Zener Diode 5.1V Zener Diode 1k Single-Turn Trimpot w/ Knob 10k Single-Turn Trimpot […]
Zelda themed DIY LED Valentine's Day car...
Create an awesome Valentine's Day card with this DIY project! This card will surely bring a smile to the face of any die-hard Zelda gamer and showcases a fun way for beginners to make a unique DIY gift using simple items and cool electronics. You can really get creative by using strips of copper foil […]
Friday New Product: Trinkets, Addressabl...
Today is the auspicious day of October 24. It is so important I can't stop thinking about it even when I am preparing my taxes. Wikipedia mentions is as a the Day of All New Products. It is celebrated as a state holiday in Namibia, where it is also known as the day of jackalope. […]
Solarbotics has been operating for more than 25 years, bringing electronics know-how and supplies to both the electronics professional and hobbyist. We'll be happy to help you too!
Solarbotics, Ltd. is not responsible for misprints or errors on product prices or information. For more information, please see our Terms and Conditions.
Warning: This product contains chemicals known to the State of California to cause cancer and birth defects or other reproductive harm.
Please visit www.P65Warnings.ca.gov for more information. This item was manufactured prior to August 31, 2018.