SeeedStudio Grove modules are here with a new standalone kit, and some new modules.
Christmas DIY LED Jar Gift
Dave Hrynkiw
December 17, 2018
Christmas DIY LED Jar Gift
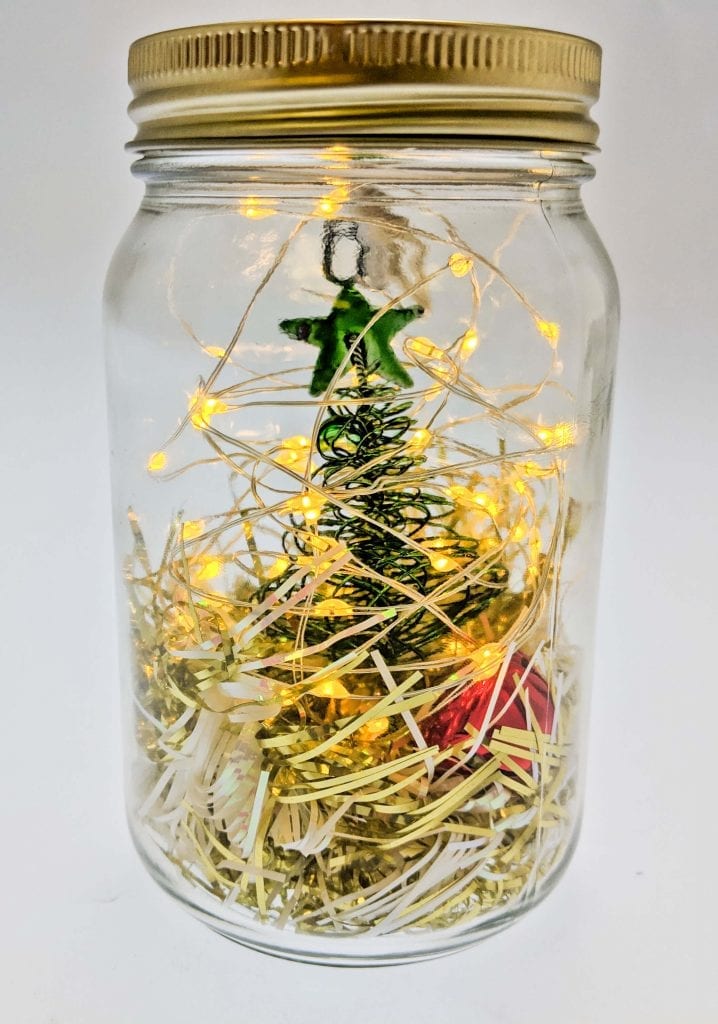
What is this? A Christmas Tornado? A Santa Storm? Yes... or simply even just a pleasant centerpiece (with a wee bit of catnip) to taunt the kitty with. Our staff has been putting on their elf hats, browsing the isles and creating some festive technobling-in-a-jar with by adding some LEDs to a Chritmas standby: The Holiday Jar.
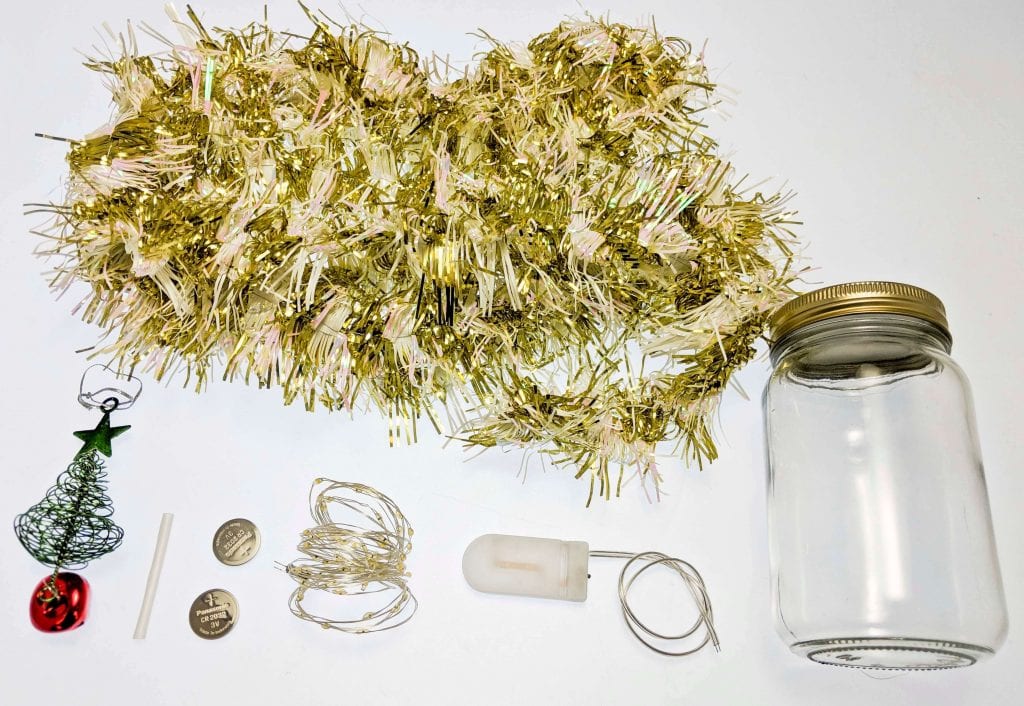
The Materials:
The essentials of this project are primarily found at your local craft and dollar-store, or even out of the dredges of your holiday decorating box. The core decorations in the jar can any number of festive doodahs but we settled on some white/gold garland, and a Christmas tree ornament. A 16oz jar houses the mix, along with a warm white LED string added for the pleasant glow.
To keep the installation tidy, we're using our 2-coin cell battery holder, a 3-meter long warm white LED string, and 2 x CR2032 coin cells, with some clear heatshrink to keep the connections clean. But at this low voltage, even tape or hot-glue will suffice.
The Tools
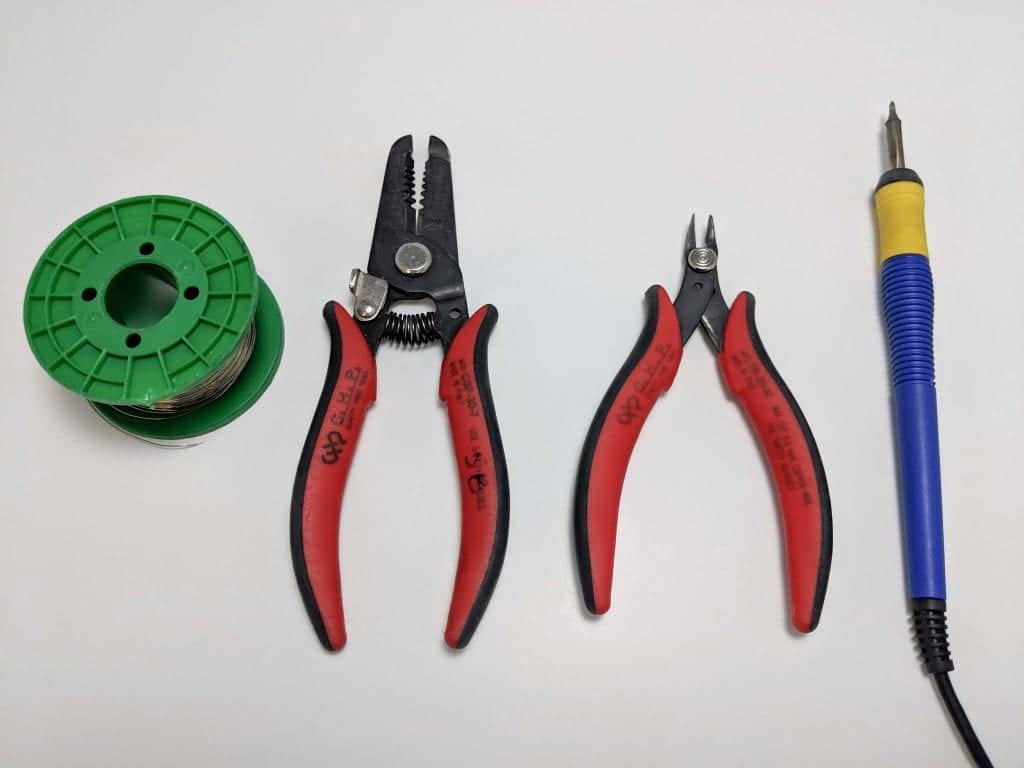
For this project, we will only need the essentials for a basic soldering job. This consists of a soldering iron, solder, wire cutters, and wire strippers. If you don't have heatshrink, you may also need some tape or hot glue.
The Build
Step 1
Let's start with preparing the electronics and soldering them together.
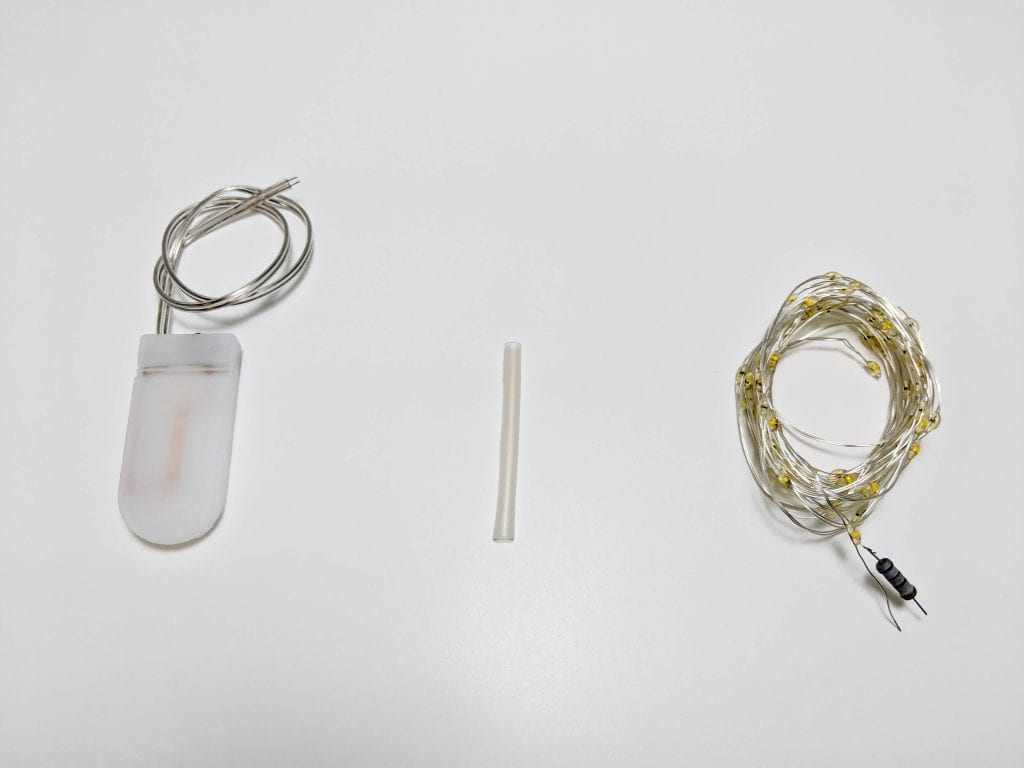
- The battery pack wires too long for this project, so cut them down to to 4cm (~1.5") and strip each wire 3mm (1/8") bare.
- If using heat-shrink, cut 2 pieces to 12mm (1/2") long and slide them onto the wires of the battery pack. Split the the battery pack wires if required.
- Determine the LED wire polarity - which is '+' vs '-'? Use one coin cell do to a quick check of the LED string. Sandwich the coin cell with the 2 wires from the LED string. Does it light up? Note which wire is touching the clearly marked '+' side of the coin cell.
No light? Swap the leads and try again. One of these arrangements must make the string light up. - The polarity of the battery pack is noted on the wire insulation. The one with the "- - -" dashes is the negative wire. Go ahead and solder the battery wires to the proper LED wires, keeping the heat-shrink in position to slide over the connection after soldering.
- Before you shrink your heatshrink or apply your tape/hot glue, confirm that your electronics work. Open your battery pack, insert the coin cells with one coin cell facing up, and one facing down. Close the pack and flick the black toggle switch on the side to the "on" position. If the lights don't light up, flip your coin cells around and try again. If they still don't light up, check your soldering and repeat this process until they do. LED's don't work with backwards batteries, but they are not harmed by being exposed to reversed batteries.
- Once everything has been confirmed working, go ahead and finish the process by heatshrinking or taping/gluing your soldered connections so that they stay insulated.
The end result:

Step 2
Now it's time to prep our jar and insert the LED string.
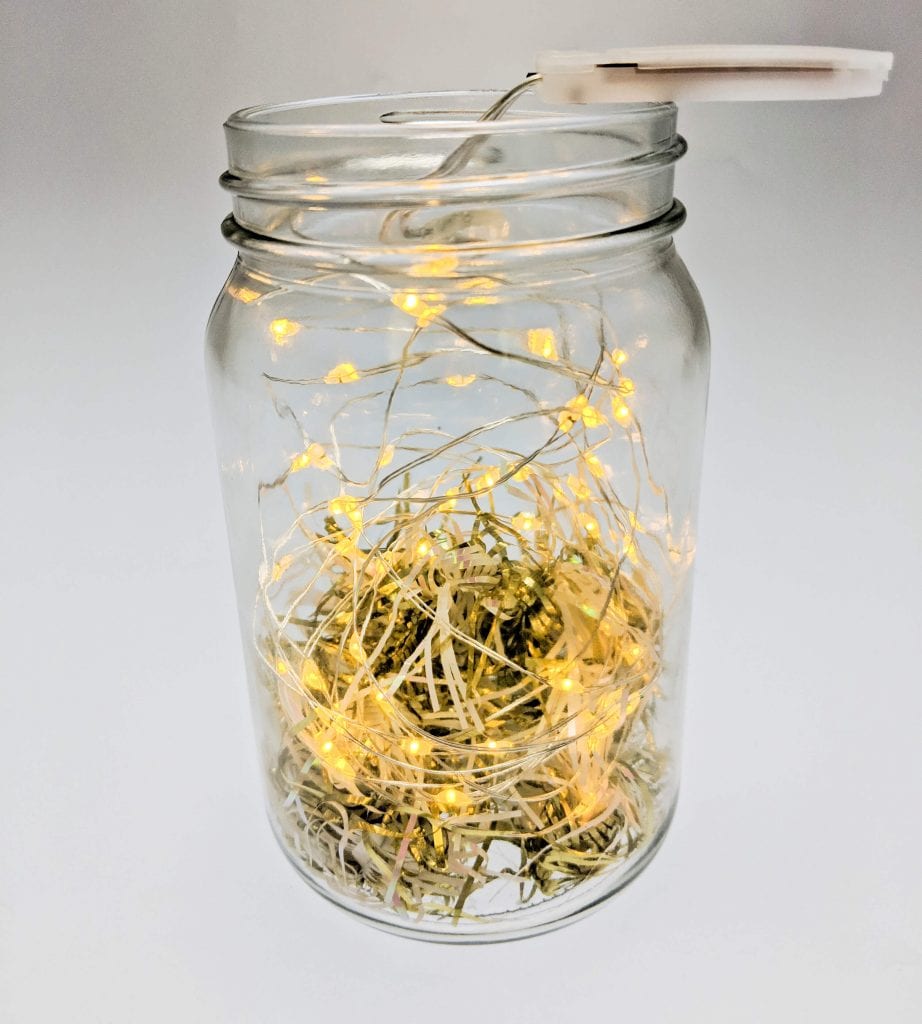
- For our jar, we wanted the LED string to kind of spiral around the decorations. To do this, wrap the LED string around a cylindrical object that is slightly smaller than the inner diameter of the jar to give it the right shape.
- Next cut the white/gold garland down to about 25cm (10") and tuck it into the bottom of the jar.
- Once it's in place, insert the spiraled LED string into the jar so that it looks roughly like the picture above. Art is subjective and flexible so don't worry if your spiral doesn't stay perfectly in place.
- Insert the rest of your decorations (in our case the Christmas tree) into the centre of the LED string spiral to finish of the internals of the jar.
Step 3
Now that our decorations are in place and our LED's have been added, it's time to attach our battery pack to the underside of the jar lid. To do this we've used double sided sticky tape, but you could just as easily use hot glue or tape.
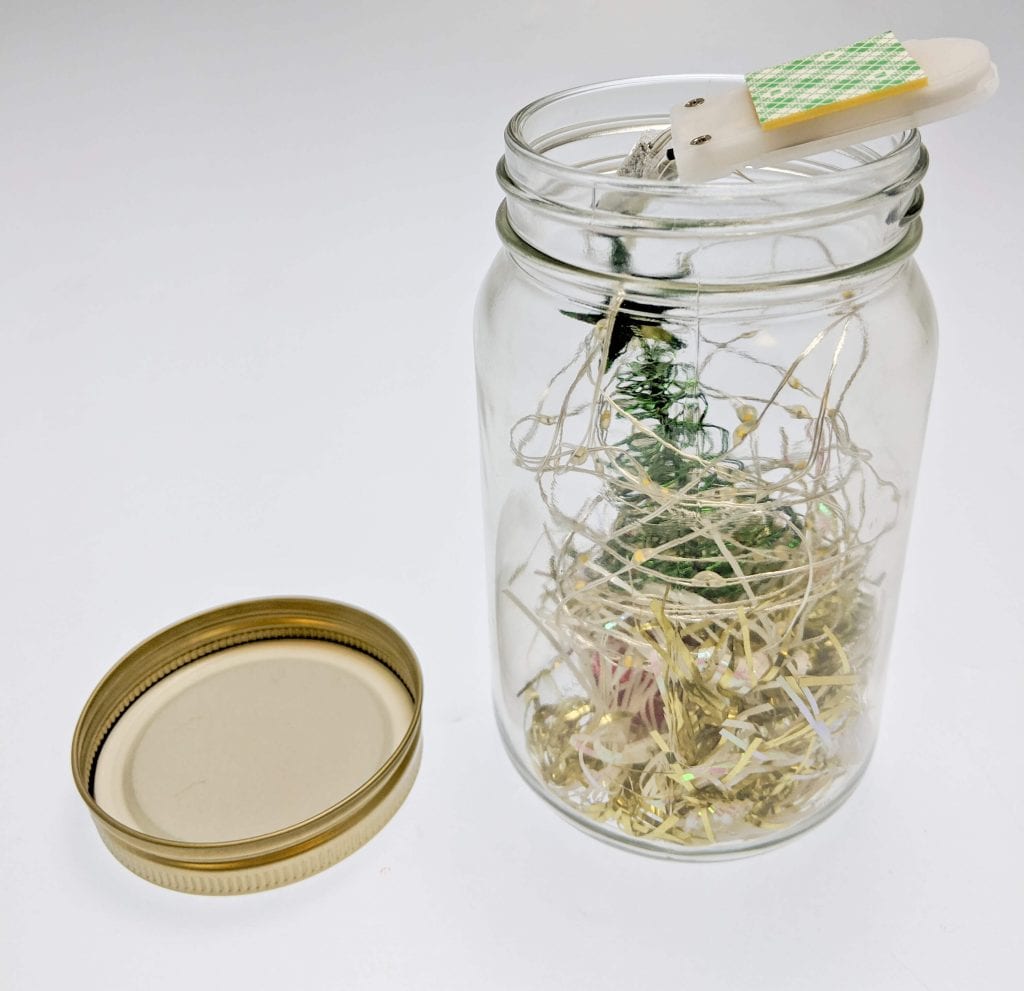
- Apply the double sided sticky tape, hot glue, or tape to the battery pack like shown above. Make sure you do this on the side that doesn't have the battery flap/door.
- Stick the battery pack down to the underside of the lid but make sure to leave some room so you can access the power switch easily with your finger. With our 16oz jar, this left us just enough room for our index finger to flick the switch.
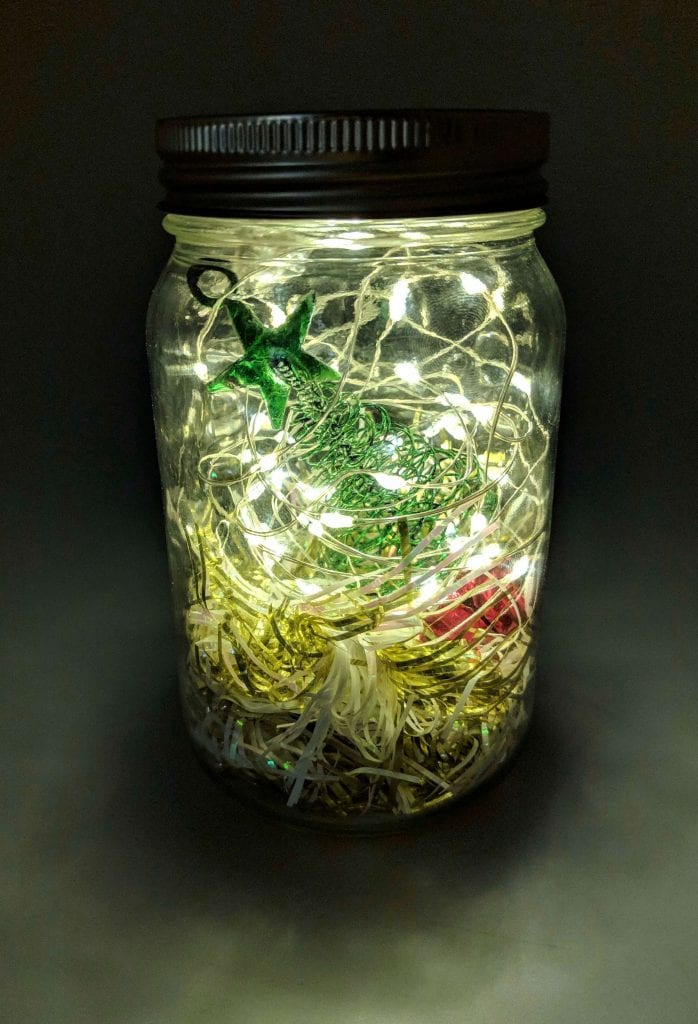
The Result
Now that everything has been assembled you should have a cool and crafty holiday gift to present to your friends and family for the season of gift giving!
MORE POSTS
Good News Everyone! New Website Launch!
We've Got A Shiny New Website Launching This Weekend! This new site corrects a slew of issues with the current website while adding or improving a number of features we think should please everyone. Because of the downtime needed to transfer & verify data from the old site to the new, Our Website Will Be […]
Canada Day - Closed July 1st & 2nd
This just in - our country is awesome. Now, we all know what you're thinking. "Yeah? Well my country is awesome too, and yours didn't even make it to the World Cup!" We certainly can't argue that your country is awesome as well. As for the World Cup... You wanna know what we think of […]
Phones are Down
Remember that time we said we were going to close for vacation, but our website and phones would stay on duty to take your messages? Well, it looks like the phones are revolting, and demanding time off immediately. Right now we're having issues with our office system, and we're unable to take calls. Please shoot […]
Solarbotics has been operating for more than 25 years, bringing electronics know-how and supplies to both the electronics professional and hobbyist. We'll be happy to help you too!
Solarbotics, Ltd. is not responsible for misprints or errors on product prices or information. For more information, please see our Terms and Conditions.
Warning: This product contains chemicals known to the State of California to cause cancer and birth defects or other reproductive harm.
Please visit www.P65Warnings.ca.gov for more information. This item was manufactured prior to August 31, 2018.