


AI-Thinker ESP8266 ESP-01 Wifi microcontroller
USD $4.50
One of the cheapest "go-to" chipsets for building an "Internet of Things" device. With b/g/n Wifi and 8MBit Memory
DESCRIPTION
Hackers were pretty excited when this chipset first came out from Espressif, as it had a great feature set for very little money, and much effort has been put into supporting it, including plug-ins for the Arduino development system. Now, the ESP8266 is a well respected module useable on any hacker's bench. You can flash it to fill different rolls, with the default acting much like an old style AT-command set modem, and another mode that let's it load and run Arduino code. Set it up as a micro webserver/access point. Pretty impressive!
Although there are 14+ versions of the AI-Thinker series of wifi microcontrollers featuring the ESP8266, the ESP-01 holds the distinction of being prized for it's great combination of size, price, and functionality. The caveat to using such an inexpensive module is that there are some limitiations to be aware of, like the weird 2x8 row of headers that make it breadboard-unfriendly, the lack of any voltage regulation, and the inability to talk 5V I/O.
So what can you load onto it? There's a few versions of firmware that you can load onto them, like:
- The default AI-Thinker firmware
- ARDUINO. This is a very robust implementation of the Arduino feature set, so you can move Arduino code to a ESP8266!
- NodeMCU - a very popular firmware that gives pretty much full access to the microcontroller and wifi functions. Runs "Lua" scripts.
- MicroPython (stripped down python 3)
- Official Espressif (the manufacturer of the chipset). They provide a nice tool for flashing the firmware.
- ESP8266 BASIC. Turns it into an access point, and lets you run BASIC programs from a web browser.
Features:
- 2 GPIO (0 and 2)
- wifi b/g/n support
Specifications:
- 8Mbit external QSPI flash memory (1MByte)
- 32-bit Tensilica Xtensa LX106 CPU running 80MHz
- 3.3V supply (current can spike 300mA+, depending on mode)
- PCB-trace antenna
- 2 x 4 dual-in-line pinout
- 14.3 x 24.8mm
- 1.5g
Programming:
There's so many ways to bend this SoC (System on a Chip), but the basics are:
- To program, you have to toggle the GPIO 0 "PRGM" pin to ground after a low signal to the "RSET" pin, so both have to have their own momentary button connected to ground.
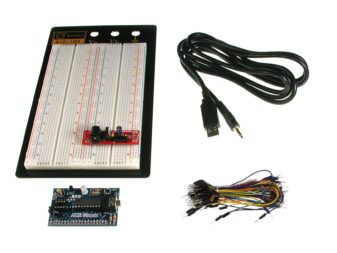
- Hook it up to a FTDI (or similar UART as shown in the product images), making sure it's configured for 3.3V.
- Program it through the Arduino IDE. After you click the "Program" button in Arduino, it will start compiling your program. At this time:
- press and HOLD your "PRGM" button,
- tap the "RSET" button
- then RELEASE the "program" button when the Arduino IDE finishes the compile, and start "programming..."
Manually wiring it up can be a PAIN. Look into the very-convenient 29248 adapter that mates your USB-TTL to it easily.
Resources:
Of course, hit up your favorite search engine, but we found Andrew Cross a great resource for ESP information. Kudos, kind sir.
RESOURCES & DOWNLOADS
Additional information
| Weight | 0.0025 kg |
|---|---|
| Dimensions | 7 × 4.5 × 1 cm |
| Ecosystem |
REVIEWS

Solarbotics, Ltd. is not responsible for misprints or errors on product prices or information. For more information, please see our Terms and Conditions.
Warning: This product contains chemicals known to the State of California to cause cancer and birth defects or other reproductive harm.
Please visit www.P65Warnings.ca.gov for more information. This item was manufactured prior to August 31, 2018.